

The Lot & Garden
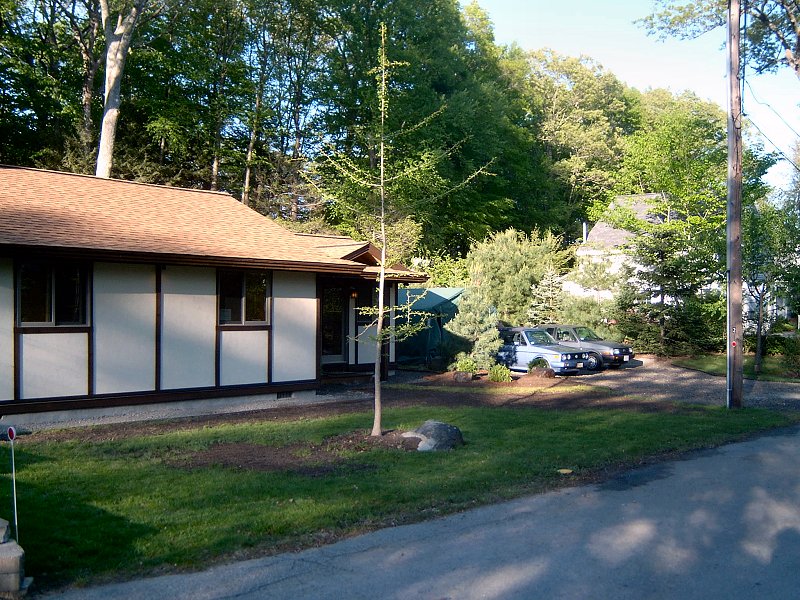
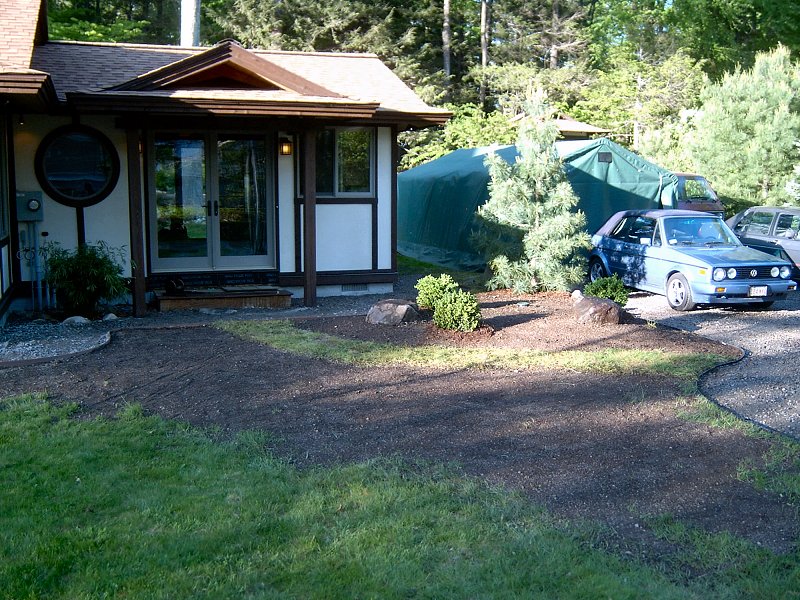
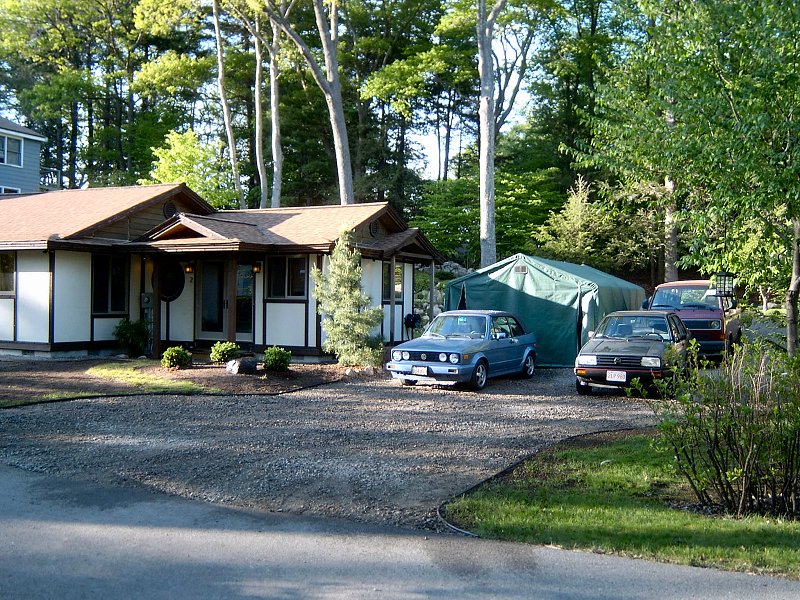
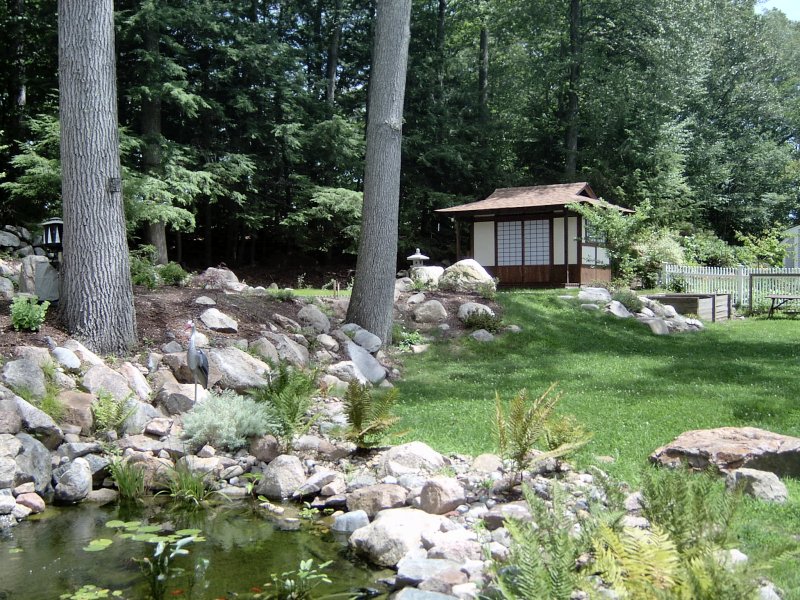 It looks a little different than it did in 2002. July 2004
The next project we tackled was the landscaping and garden once the septic system had been installed (see the House section for details). The house was essentially surrounded by mud at that time, and while some folks thought we were nuts for doing the garden first, I didn't want to live in a mud pit while trying to work on the house.
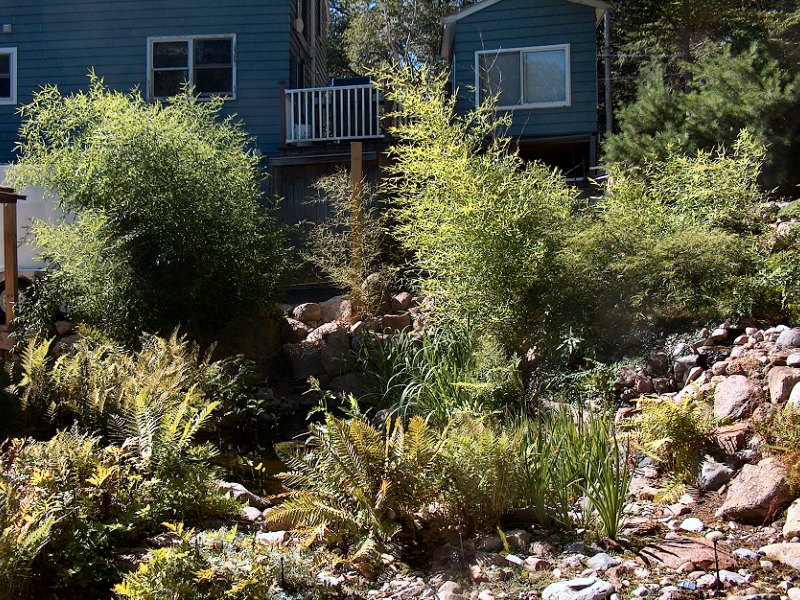
The basics of the lot are that it's a roughly 100 foot by 100 foot square lot with about a 30 foot change in elevation from the back of the house to the Northwest corner of the yard. The front of the lot faces South as does the hill in the back, so there's plenty of sun for the plants. The boundaries of the yard are defined by the street in front, a white picket fence on the East side, a landscape-block wall on the West, and a very old stone wall on the North. The house was built before there were zoning regulations governing set-backs from the lot lines, so it's only about 6 feet from the property line on the West, and about 15 feet from the front property line. As long as we don't change the foot print of the house, those set-backs remain valid so we get to enjoy a larger back and side yard than what we'd end up with if we tore the place down and started over. I think the photo below was taken either in late 2002, or early 2003.
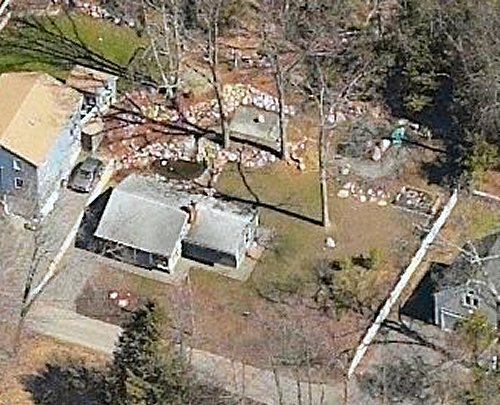 A bird's eye view. Winter 2002?
Since the garden accounts for a significant portion of the renovation project, I've split it up into several sections that deal with different aspects of the garden construction. I've included some information here regarding how we got started with the initial landscaping and the irrigation system since those were among the earliest projects. The majority of the work that was done on the yard was undertaken while we were both still working full-time. We were also struggling with decisions about finding a general contractor for the house, what parts of the house we would start with, and working out the budget for that. With lots of things to consider at the time, doing some yard work was a welcome diversion.
Initial Landscaping
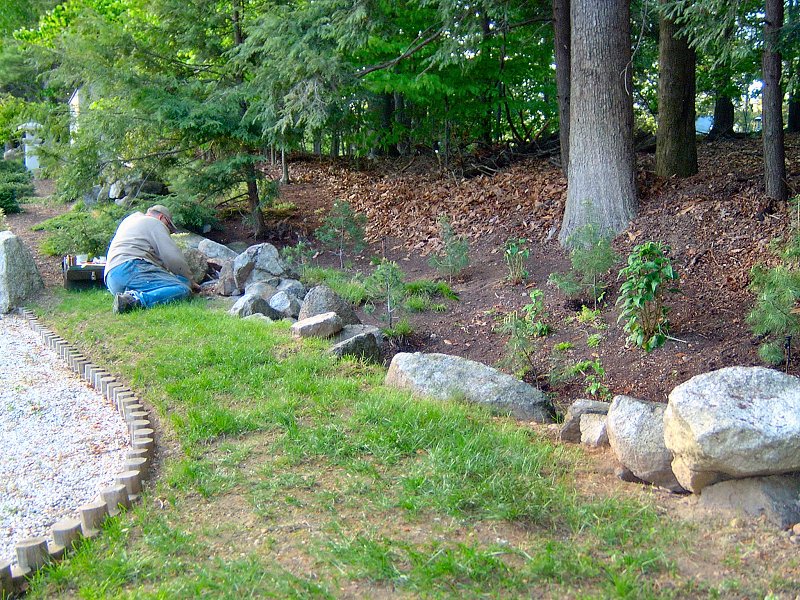
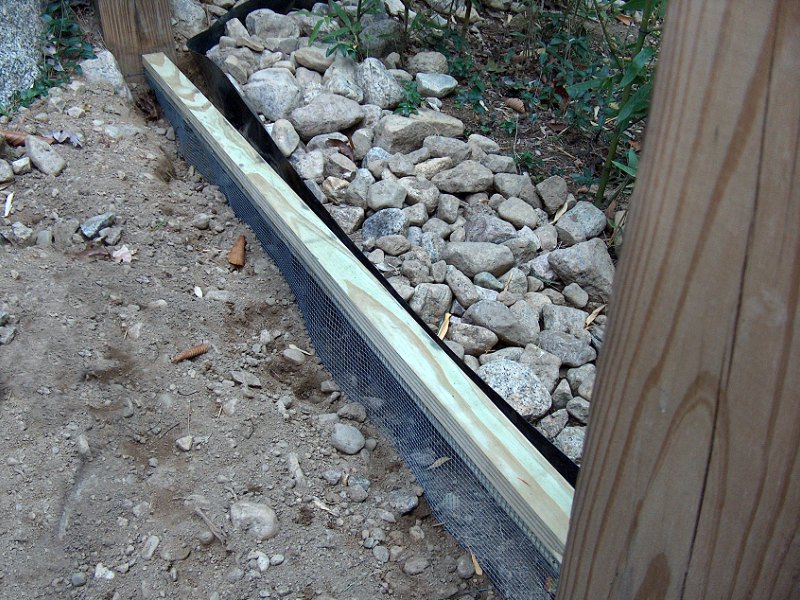
The original plan for the yard from the septic designer was to rebuild the hill that had been flattened out for the leach field and then bring in the hydroseed machine and make it all grass again. We put a stop to that idea rather quickly, and set about finding a landscaping contractor to get a layer of topsoil spread over the mud, re-arrange some rocks, then perform the excavation needed for the dry landscape area. We ended up with a friend of a neighbor who showed up with his Bobcat and mini-excavator and got right to work telling us what we were supposed to do with our yard. In a way I'm glad we started the project with a contractor rather than doing it ourselves, since we learned a lot about how to deal with contractors. We mostly learned we didn't want to deal with contractors any more.
It all seemed simple enough to me... spread the topsoil so the water runs down the hill in back, then around the house to the street out front. Dig down the area at the leach field and use the soil to build up the edges of that area. Then put down weed barrier fabric, fill the flat area with stone dust, then a top layer of white gravel. Flatten off a 12 by 12 foot square area in each corner of back yard, top with crushed stone and pack it so we can put sheds there. Finally, rearrange some rocks that we'd just sort of scattered around since we had to leave room for the big equipment to get in and out of the yard at the time.
In order to avoid a rather long rant, I'll just say I was relieved when we finally paid him and he went away. I've since moved by hand most of the rocks he moved with his machine. I've dug up by hand all of the gravel in the karensansui , moved it over, dug the base grade deeper, put the dug-out material around the edge to build up the banking, then put the gravel back down. I've re-graded and wheeled crushed stone by hand up to the shed locations before I could build the sheds, and we'll likely have to hire another contractor to properly grade the yard again before we can build a deck or patio out back. I figured out that if I want something done right, I have to do it myself. I can explain how I want something done to a contractor in great detail, but they still do exactly what they want to do, because they know better than the silly home owner. The fact that I'm giving them thousands of dollars has no bearing on their ability to consider what it is I want them to do - they just do it however they want so they can get on to the next job. Ok, I'm ranting. I must also add that I have found a few contractors that really do care about doing the job the way I want it done, but that seems the exception rather than the rule.
The Front Yard
We really hadn't done much of anything with the front yard since the initial landscaping was done, other than move the driveway while installing the new roof back in 2006. The front yard still had a few low spots in it, especially right around the front door, which made getting into the place during wet weather a muddy proposition. Since we'd picked up a 3rd car in 2008 that allowed us to take the Cabriolet off the road in the Winter, the driveway was getting very cramped.
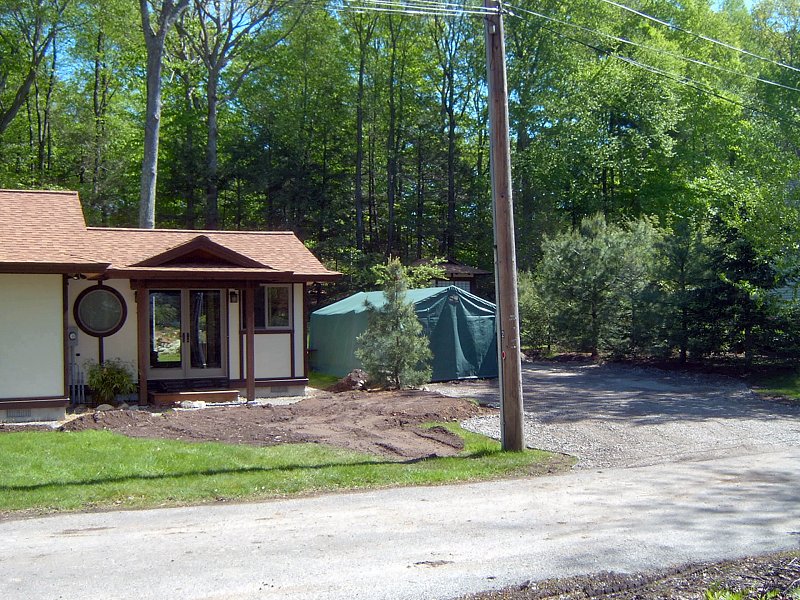
The New Driveway: Late Spring, 2010
While working on the candle pinching on the Pines this Spring, I noticed my neighbor brought his skid-steer machine to his
house to do some work on his retaining walls and upper driveway. I mentioned that perhaps he could cut my new driveway
while he had the thing here (mostly kidding), and he said sure! He asked for some help with his planting and transplanting
on his new flower beds / retaining walls, then if I marked out where I wanted the driveway and ordered the gravel, he'd
take care of it. Such a deal.
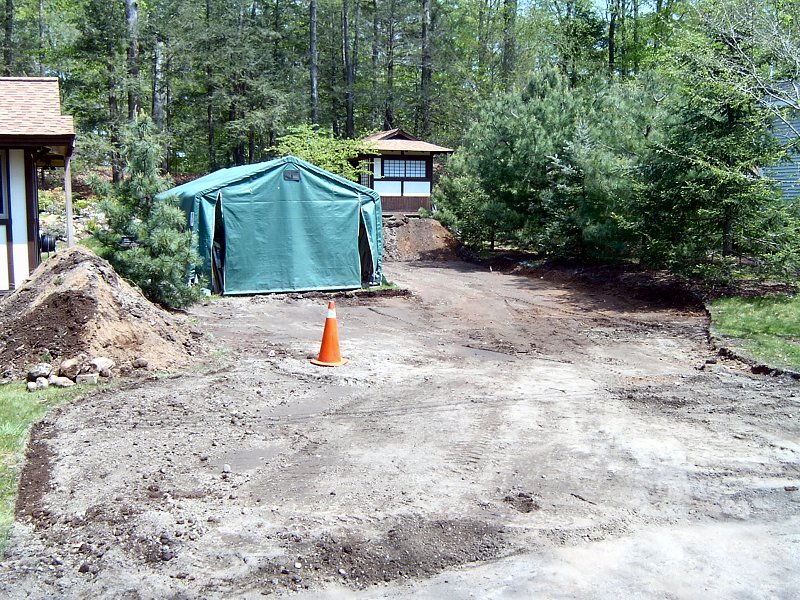
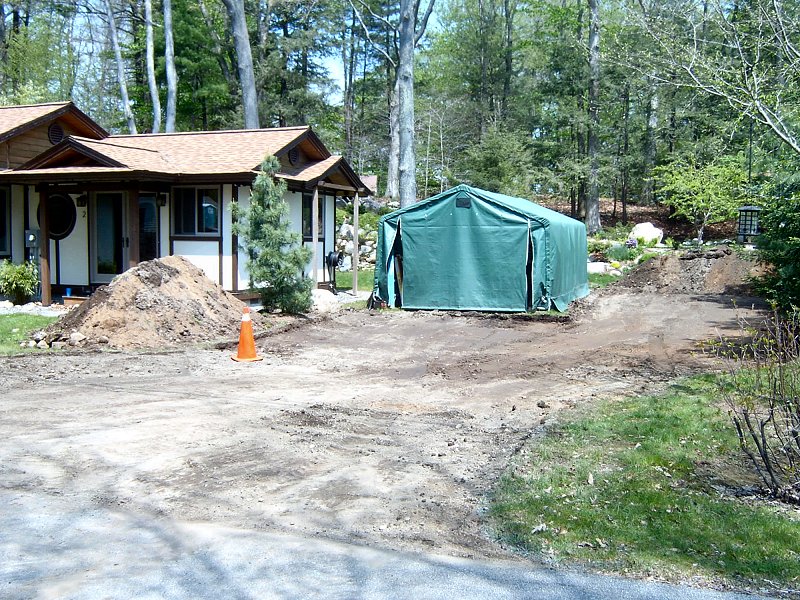
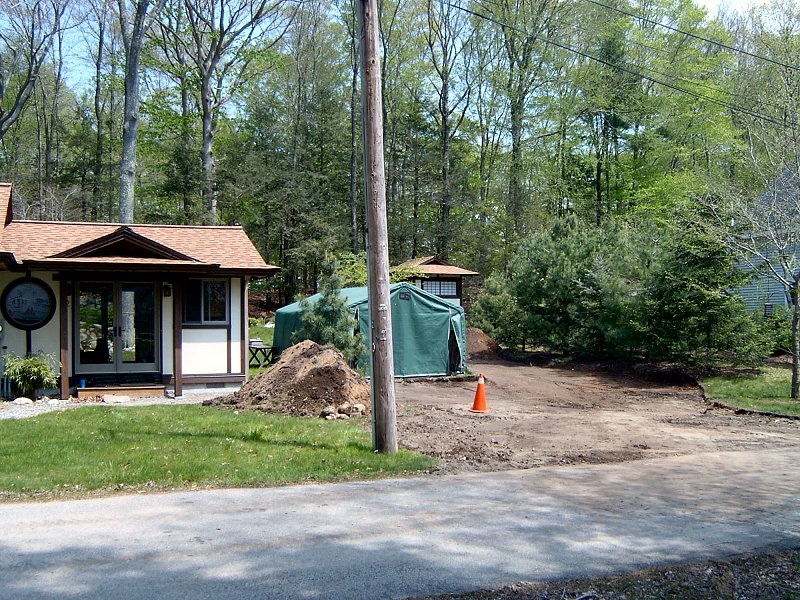 Cutting in the new and improved driveway (4 photos).
I'd already done the plot plan for the final driveway (see the Garden Design section), so it was only a matter of doing some measuring and staking to figure out exactly where it was going to end up. Once I had everything marked out, I used a power-edger to cut the sod along the lines, then peeled up a strip of sod about a foot wide all along the new edge ( this would make it much easier for him to see exactly where to dig and where not to). When we'd done the initial landscaping we'd added a fair amount of topsoil to the front yard, and now that was all going to have to get dug out down to the original gravel base to keep the driveway from becoming a mud pit every time it rained - which it was already doing quite a bit since we'd only re-used the old gravel / pack material when we moved it in 2006.
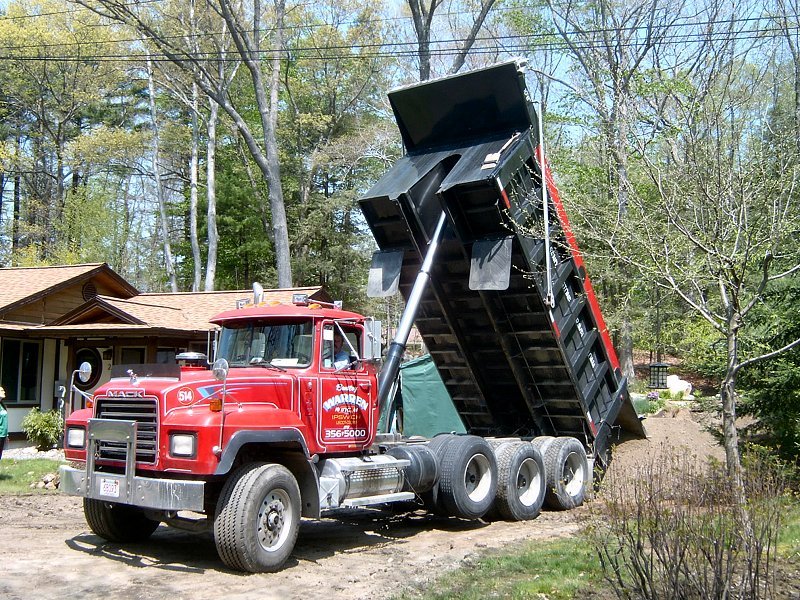
Once he got all the topsoil moved into a couple piles around the yard and spread what was left of the old driveway material across the new area, I ordered gravel for delivery the next day. While waiting for the gravel to arrive, we took care of his transplanting needs and my end of the bargain was complete (although I did get him a case of beer after he'd finished, since I'd definitely gotten the better end of the deal). He spread the pack material into place, and even though this wouldn't be the final finish surface, we were still going to need some more material to complete the driveway base, as well as to bring up the paths around the entrance of the house. The first delivery in the 10-wheeler was for about 17-1/2 tons of pack, so for the second delivery I ordered a 6-wheeler full, which dropped another 10 tons of material. The final surface will consist of washed bank gravel (which is much more attractive, as well as twice the cost of pack), and we'll likely just use another 10 ton load of that as well.
 Edging the driveway & bringing up the front yard (3 photos).
Before the second load was delivered, I had a large pile of topsoil at the end of the new driveway that would need to go away. I was planning to use the topsoil in front of the house to create a new raised planting area near the front door, as well as to fill in the remaining low spots in the front yard. The rest of the material just wasn't needed so I talked to another neighbor from down the road that I knew was usually looking for fill material, and he's got a nice John Deere tractor with a front-end loader and big turf tires on it. I asked if he'd spread the front pile in the front yard where I wanted it (since his machine wouldn't tear up the lawn like the skid-steer would) in exchange for letting him take the back pile away - but it had to happen soon so I could get the rest of the gravel spread with the skid-steer while it was still here. He agreed, and we made it happen in an afternoon. It's mighty nice getting along with the neighbors - especially when they own heavy equipment.
With all the machine work done, I figured I may as well just finish the lawn and path work by hand as soon as possible, even though I hadn't planned to do any of this driveway stuff this Spring. The plan is to eventually build a cobblestone apron at the end of the driveway, then edge the driveway with more cobbles - I'll worry about that after the garage is done and it won't get torn up by more heavy equipment. In the mean time, since I'd already cut nice lines in the turf when we re-did the driveway outline, I thought it would be a good time to get some kind of edging installed to keep the accurate profile we'd cut. I couple years ago I'd purchased a few rolls of Fiskar®'s "Dirt Grip"™ Landscape Edging, which is pretty nice stuff. Rather than stiff plastic, it's got a semi-flexible rubber flap on it, and an extra flap that acts like a barb to keep the stuff in place rather than having to use a bunch of stakes in it. I had 3 rolls, or 60-feet, so it worked out to be just enough to do both sides of the driveway. I would have liked to do all the edges with it, but it doesn't seem to be available anymore (and I don't know why, since it's very easy to use). For the border path in front of the house, I ended up using Easy Gardener®'s "Ultra Edge"™ Composite Landscape Edging. I used the 5-1/2 inch tall stuff, as I had to make up a fair amount of material at the East end of the house. At the West end, I buried almost all of the edging in the ground, but at the East end, I ended up having to add a lot of material to keep it level, as suspected. Hopefully we won't have to puddle jump to get to the front door anymore, now that ther's another 5-inches of gravel out there.
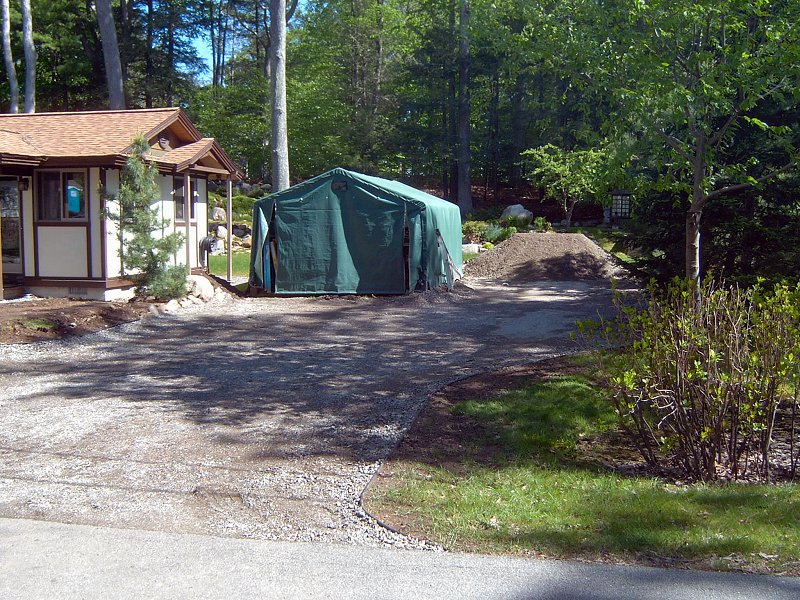
 The new driveway (3 photos).
Once the edging was all installed, I managed to find a couple appropriate sized rocks in the local woods, and got the neighbor to come drop them off with his skid-steer just before he loaded it on the trailer and took it away. After a bit of pry-bar work, I got the rocks where I wanted them then picked up a few 'Green Velvet' Boxwoods to add a bit of interest to the raised area near the entrance. The final task was to get a path laid down to the front door. Eventually it'll be a stepping-stone path, but for now I just built the path out of sod we'd taken up when cutting the driveway so we'd have some place to walk while the rest of the area got an application of grass seed.
We're very happy with the new driveway, and have plenty of room for the vehicles now. I'm not sure what the final finish is going to be on the raised area near the entrance - I'm not a big fan of just covering the whole thing with bark mulch, so for now I've put down grass seed to keep the thing from washing away when it rains. With the rocks and the few shrubs, I'll likely just wait and see how it develops. I intend to work the shrubs into a low spherical shape, or tamamono sheared style, and I'll need to find an appropriate anchor stone to set toward the back, in front of the existing Silver Ray Korean Pine. I'm also planning to make another stone lantern for out front in the center of the new "mound", which will be type of yukimi lantern called a Kanjuji.
Irrigation
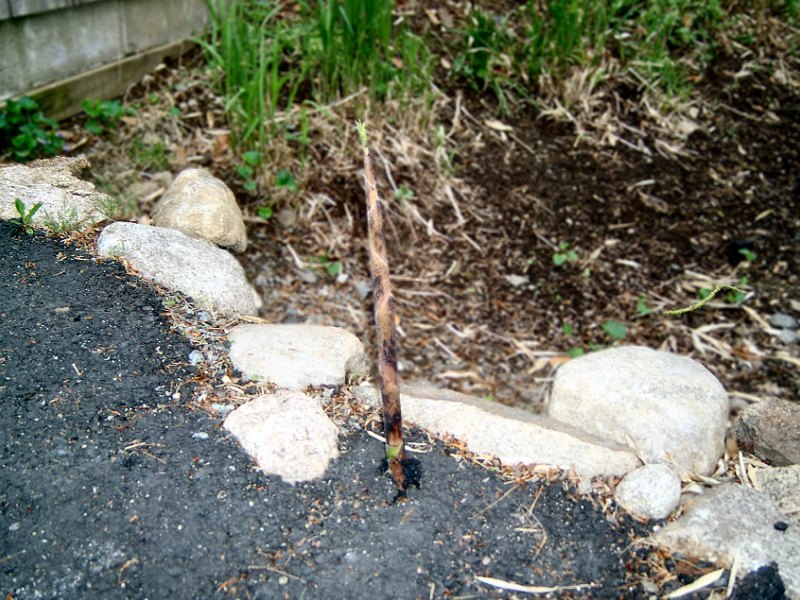
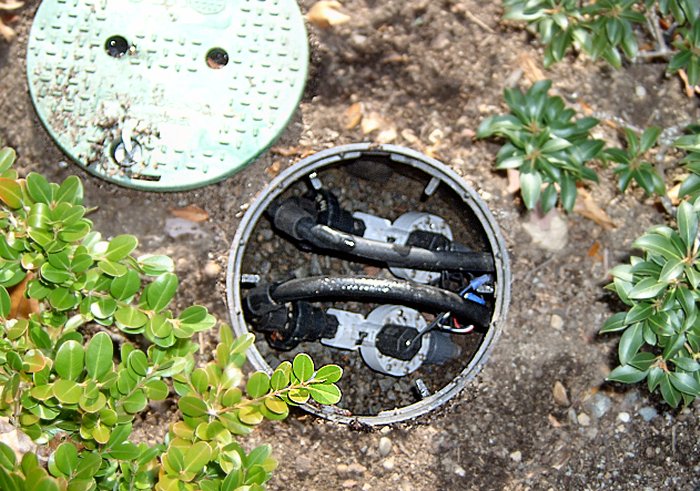
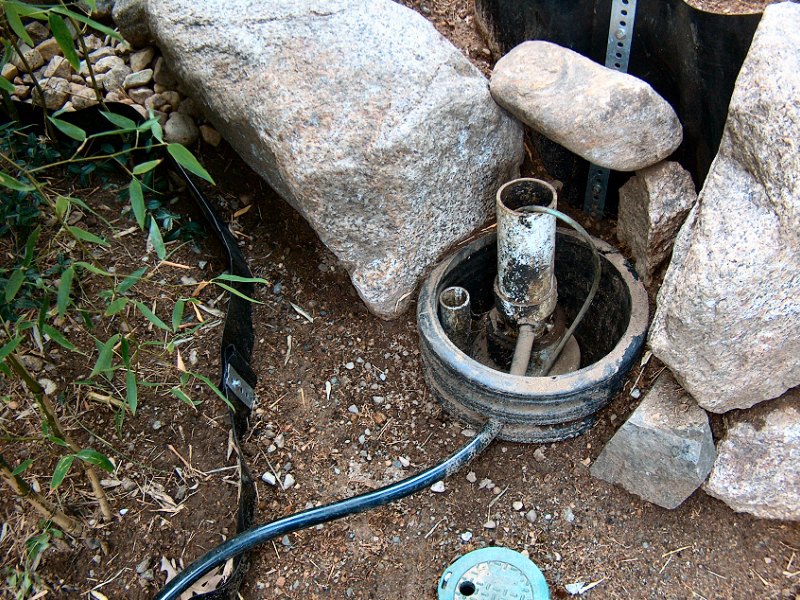
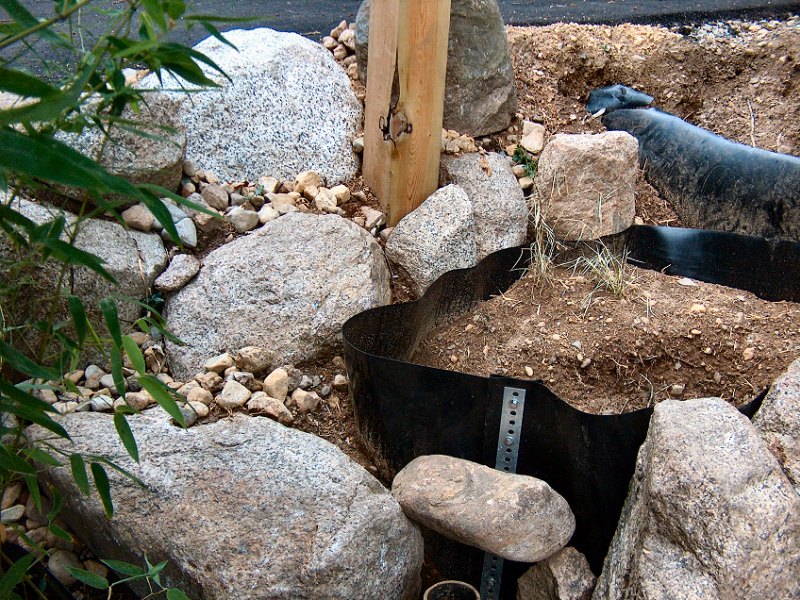
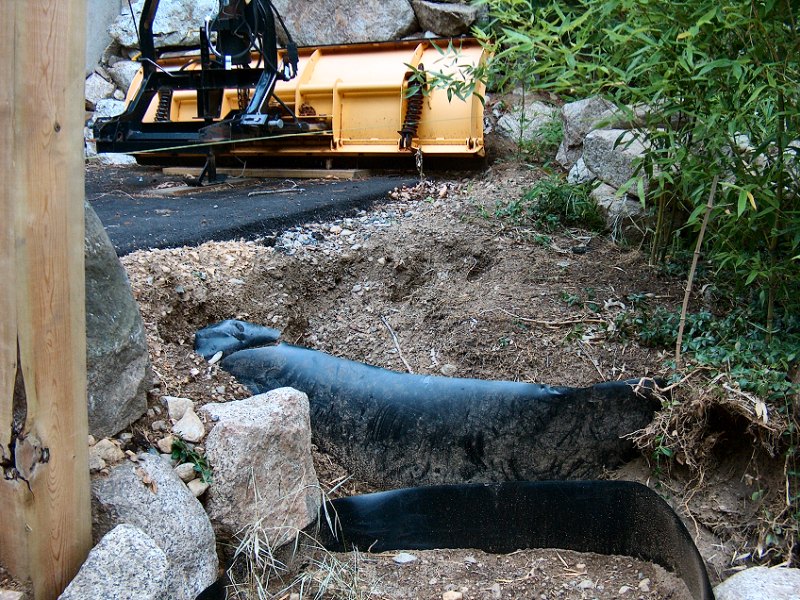
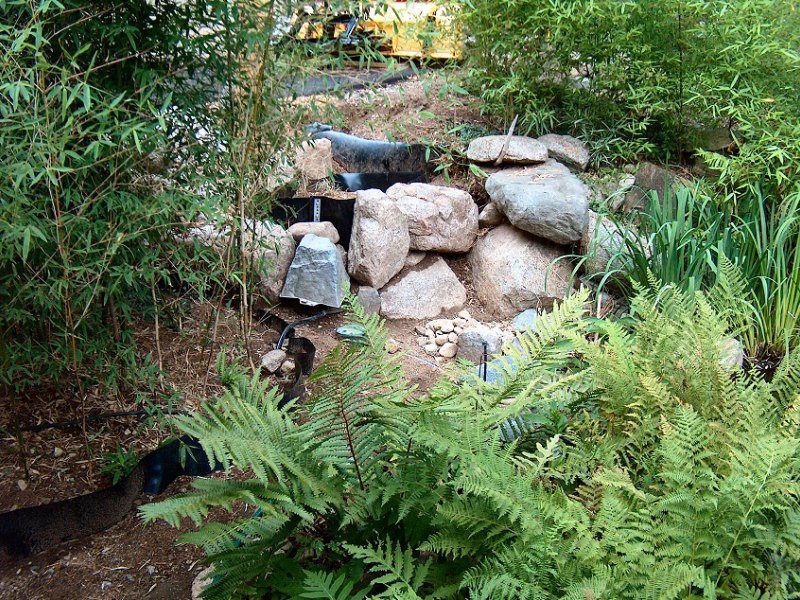
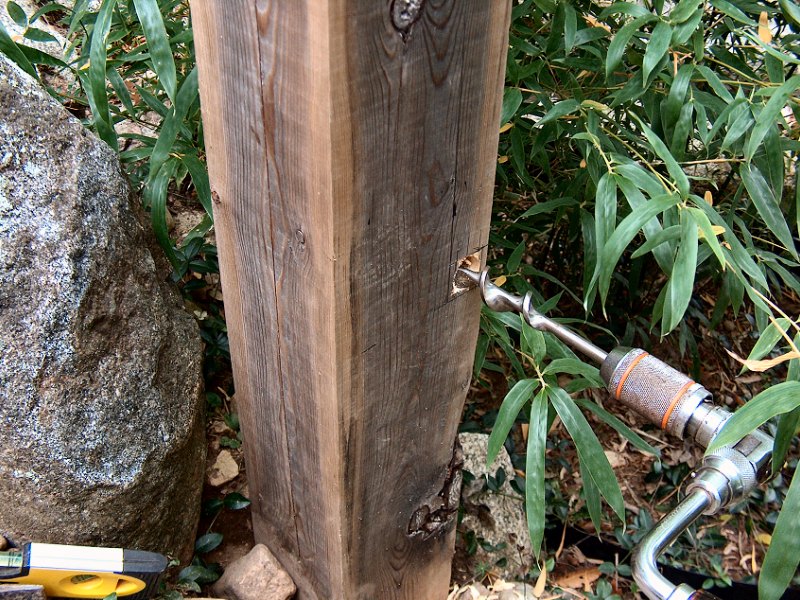
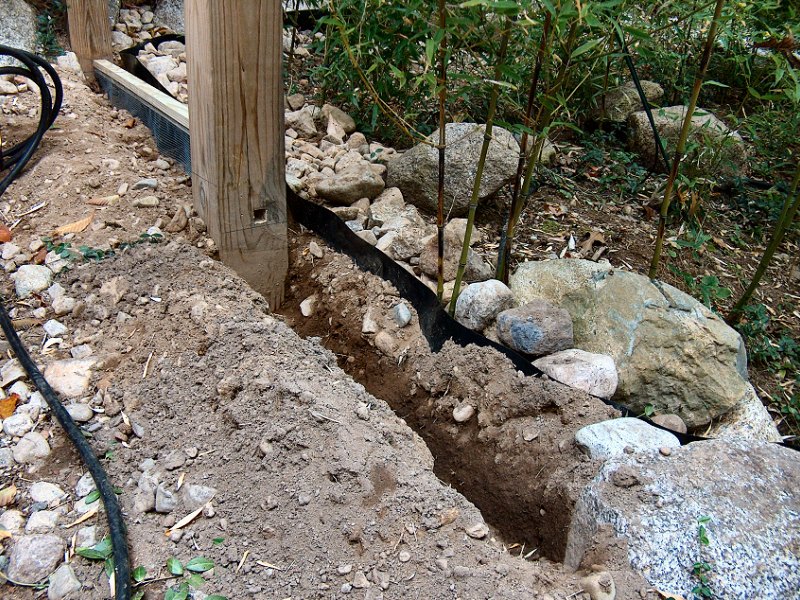
One of the problems with trying replicate the lush moss tea gardens of Japan is we don't enjoy the same extended rainy season here in New England (perhaps that's not such a bad thing). Even before we started transplanting moss and ferns into our garden, we realized the futility of trying to hand water the numerous shrubs and ground covers we'd planted the first year of the project. While the plants received plenty of sun throughout the day for vigorous growth, the back hill really got baked in August with its Southern exposure. We'd spend a couple hours almost every evening out there with the hose trying to give everything a good soak, but it was just too time consuming to keep up that nonsense (although the mosquitos sure enjoyed our time in the yard during those late summer evenings). Although I wasn't sure I'd use it at the time, before they back-filled the leach filled I had laid out a length of 1" black poly pipe from the house up to the center of the back yard, then tee'd it to run along the length of the back wall to each corner near the septic vents. I also laid out a couple lengths of 12-3 UF to each corner in case I wanted power back there. As it turns out I later used both the water and power at each location, and was very glad I didn't have to dig up the yard to get everything installed.
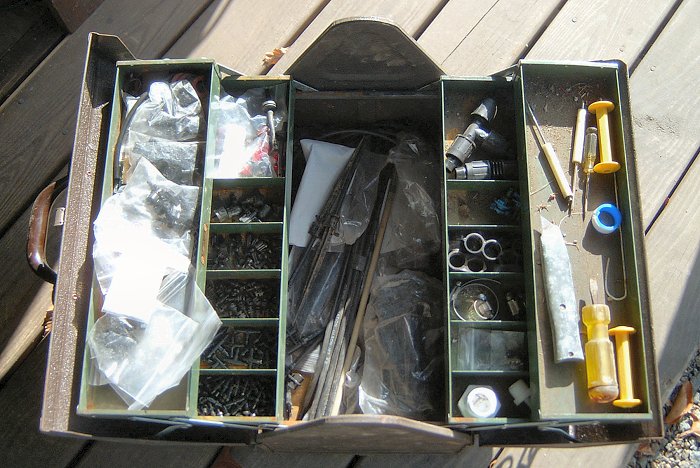
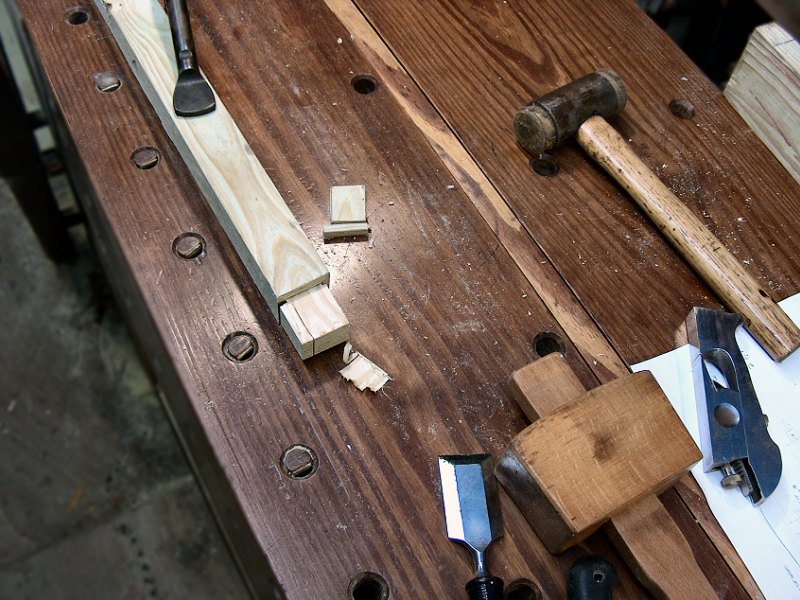
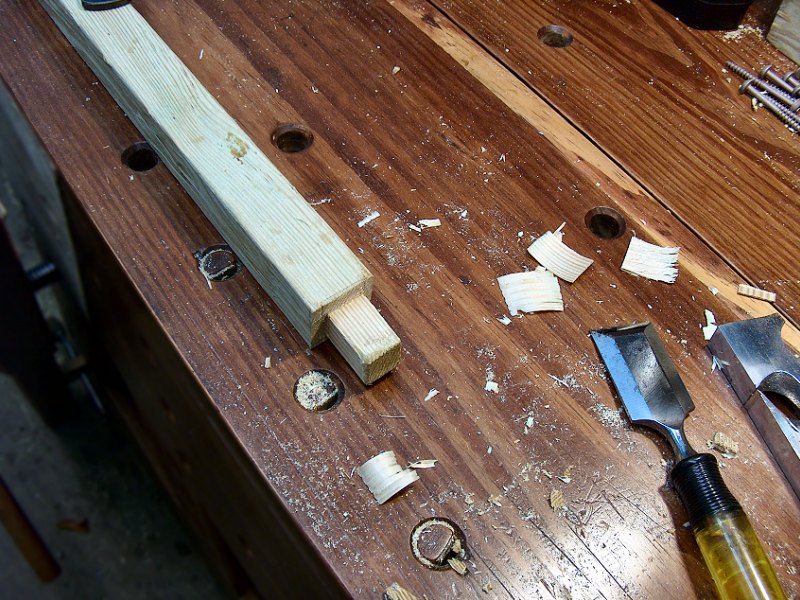
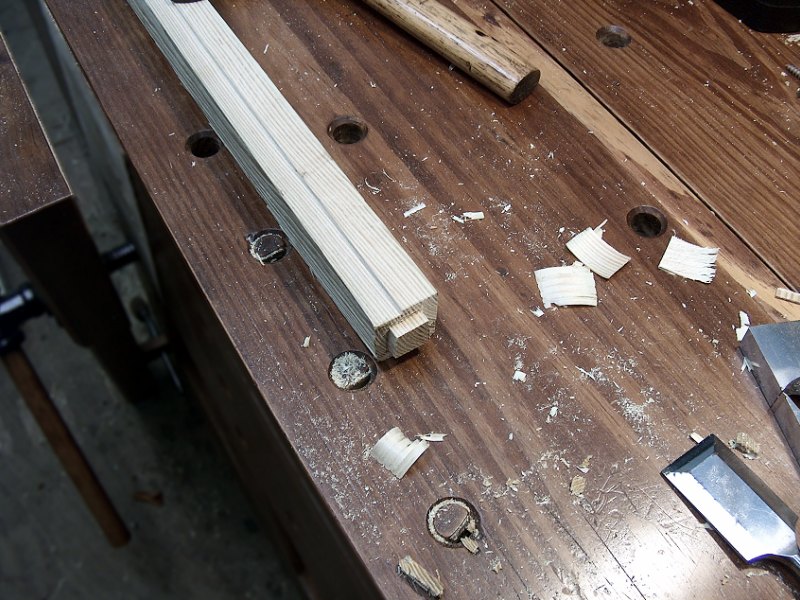
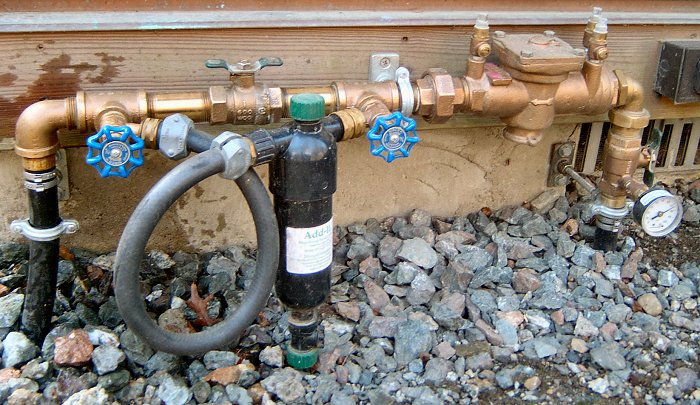 Irrigation components, November 2008. (6 photos)
I wasn't interested in installing a bunch of pop-up lawn sprinklers as a brute force, hose everything down solution, since that
uses a lot of water wetting down stuff that doesn't need it. I decided that incorporating a highly efficient micro-irrigation system that utilized drip
emitters at each plant and misters for the moss and ferns would be the way to go. I ended up getting all my supplies from Dripworks.com
![]() and have been very pleased with their
fantastic service, fair prices and fast shipping.
and have been very pleased with their
fantastic service, fair prices and fast shipping.
The cost of everything I needed for the initial installation was under $400 (including the timer and electronic zone valves), which was certainly very reasonable. Performing the installation was another matter entirely, and explains why there doesn't seem to be many folks around willing to install these types of systems. It's not particularly difficult work, it just takes a long time. I started by mapping on graph paper where every woody plant was planted, then added areas that would need misters or micro-sprinklers to take care of ground covers. I then totaled up the amount of volume required to run all that stuff, and figured out I'd need to break it up into 4 zones based on the pressure and flow rate available at the source. The next step was to install the valves for the 4 zones in the 1" main line and run low-voltage control wires from each valve to the control timer. With the valves installed, I then ran lengths of 1/2" thin wall poly from each valve to feed the various zones, branching as needed to cover everything I'd mapped out. The 1/2" trunk lines get buried just a few inches below surface in the mulch, so a sunny day or a heat gun were needed to persuade the stuff to go where I wanted it.
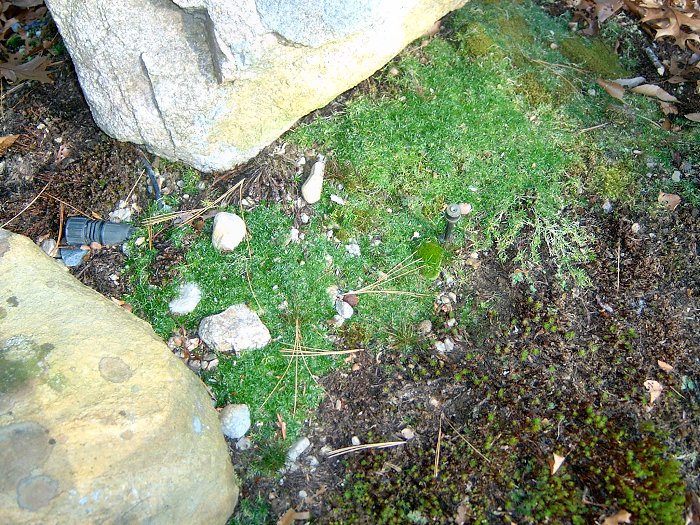
Once the 1/2" lines were all installed, flushed and capped, the time came for the real nit-picky stuff: the installation of the emitters and sprayers. Every woody plant received a pair of 1/2 gallon-per-hour drip emitters on each side of the main stem, attached through a 1/4" feeder line that was connected to the trunk line with a small plastic barbed fitting. Sprayers and misters are threaded into a 1/4" diameter thick-walled riser tube that then attached to a support stake, and more 1/4" feeder tube back to the trunk line. As I said - not particularly difficult work but it required hours and hours of crawling around in the garden fussing with little plastic bits. When the system was finally all installed, I set the timer to run for 20 minutes per zone, starting at 5am each morning, and it does a wonderful job of keeping the plants happy all summer long. I also connected a rain sensor to the control timer, which shuts down the system during and after any significant rainfall.
Living with the Garden
 Tinkering with the irrigation system.
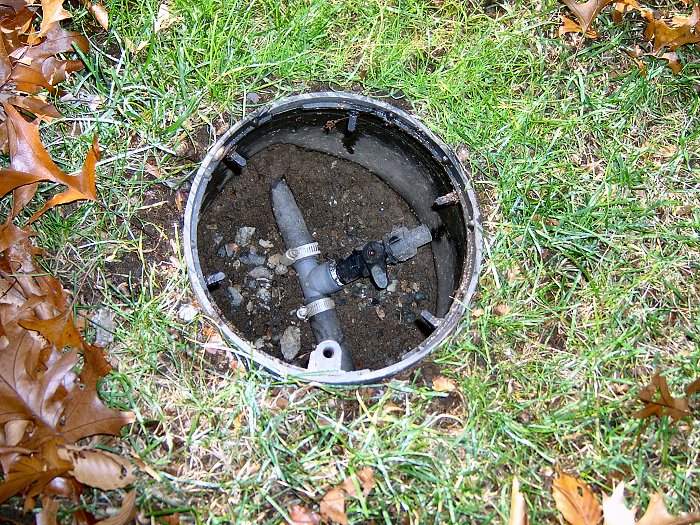
Irrigation System Maintenance
Since the initial installation back in 2003, I've expanded the irrigation system to accommodate additional plants and the growth of
existing plants, upgrading to larger emitters on some plants and installing new feeders as needed for new plants. I've also replaced
the vacuum breaker I initially installed at the source (which was just a length of hose attached to a tee on an outside hose bib)
with a proper reduced pressure zone backflow preventer that's piped in to the plumbing system. The idea was to have all outside water
supplied from a deep well that I got working again after it had been disconnected by the original property owner when municipal water
was installed. Unfortuanely, there's so much iron in our ground water here that when I used the well for the irrigation system, it
turned many of the rocks orange with rust as soon as it came out of the misters (cleaning that up should be interesting). I've still
got the well connected to all the hose bibs for outdoor use, (which is mainly for filling the pond without the need to add de-chlorinator),
and the irrigation system was re-connected to municipal water when the backflow preventer was installed. I've also installed a fertilizer
injector in the system that allows us to give everything a shot of Miracle-Gro® every two weeks throughout
the growing season.
The only real maintenance required is a day each Spring going over the system and re-burying a few lines the get squeezed to the surface over the winter, and a few hours each Autumn draining everything down, pulling the valves, and replacing the sealed feeder caps with self-draining caps (we don't have to blow out the lines with air with the valves removed - the little water remaining in the lines can freeze and expand without damaging anything). The micro irrigation system has worked out beautifully to help maintain all the plantings in the garden, and allows enough flexibility that plants can be moved or added without a huge hassle.
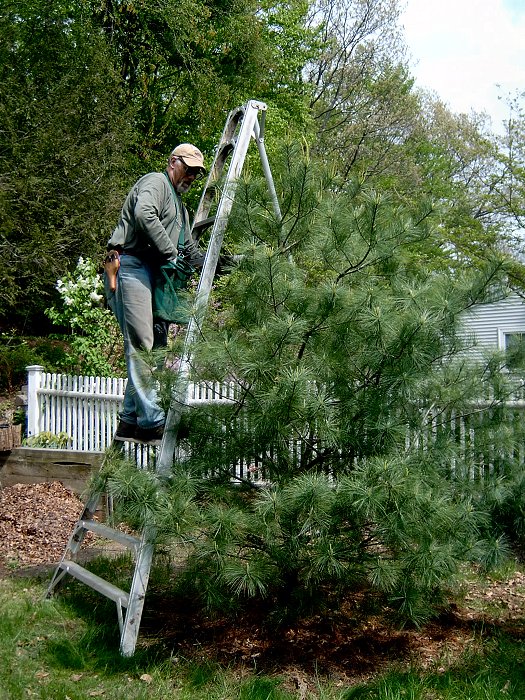
 A tripod ladder is must-have for safe tree pruning.
General Pruning & Plant Care
As the plants have begun to approach their mature sizes, I began pruning a few times a year to achieve the shapes and styles appropriate to
a Japanese style garden. I really enjoy pruning, especially with good quality tools (Felco and Okatsune are my favorites by far), and the effects
should start to show over the next few growing seasons. Other than pruning, mowing the lawn, and bi-weekly feedings, the plants require little care
thanks to the irrigation system. I don't look at working in the garden as "working" either - if I didn't want to go tinker in the yard, I would
have gone for lots of rolling lawn and a riding mower - time spent in the garden is time well spent, which is why we built it in the first place.
Keeping up with leaf clean-up is probably my least favorite garden chore, although it only takes a couple of weekends each fall, as long as we don't get too much rain so the leaves are dry and the mulcher/vacuum unit can get them up. We also need to remember to get the net over the pond before the Oaks let go, or the pond will completely fill with leaves. Once the weather turns consistently chilly (below 50F), the fish pretty much go to sleep until spring, and the pond filters get shut down since there's no more fish waste to process during the winter. The only other winter activity in the garden is some dormant pruning on the Maples, fruit trees and Clethra, which I usually do in February.
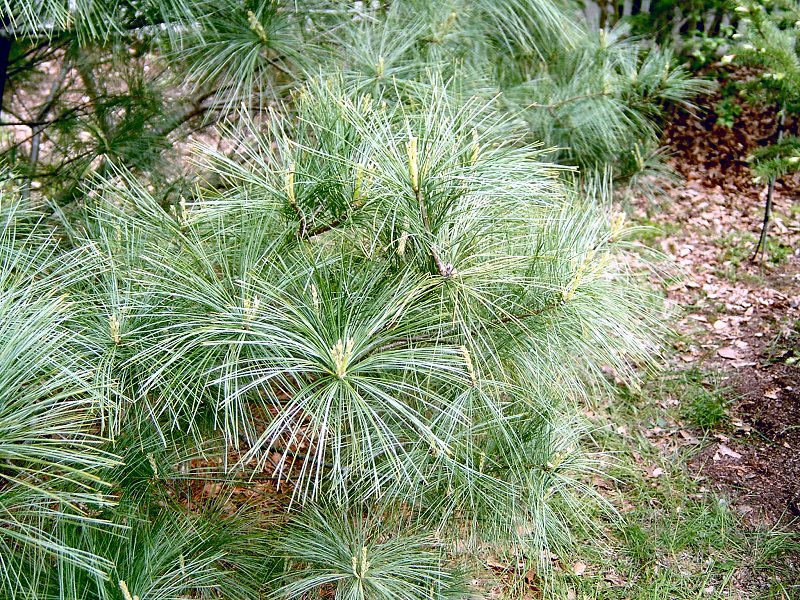
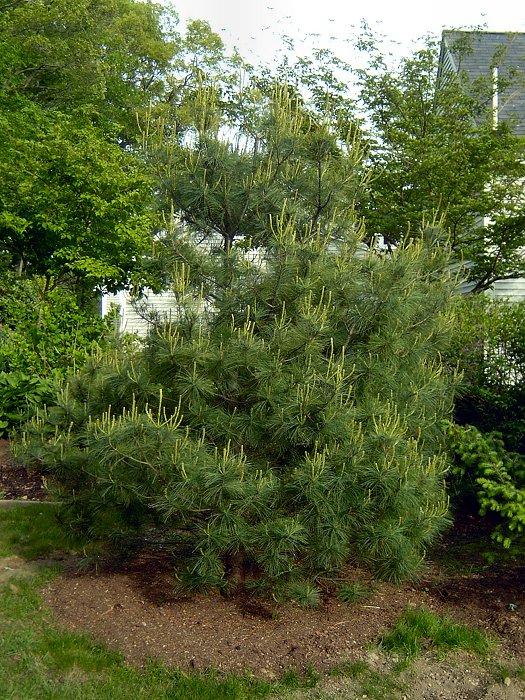
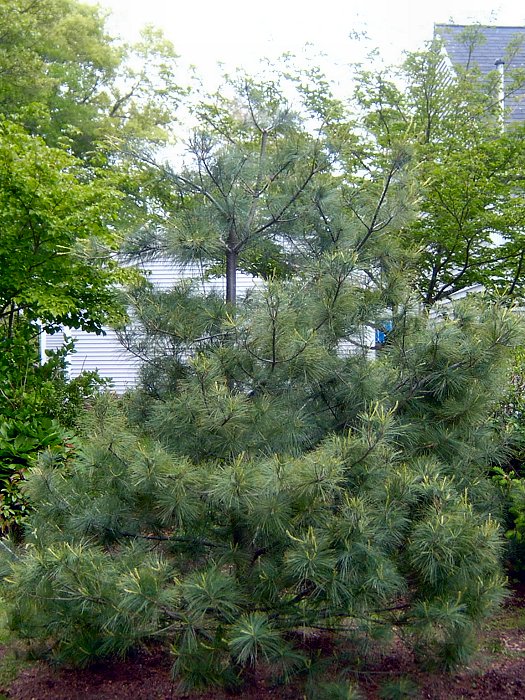
Pine Pruning - Creating Niwaki
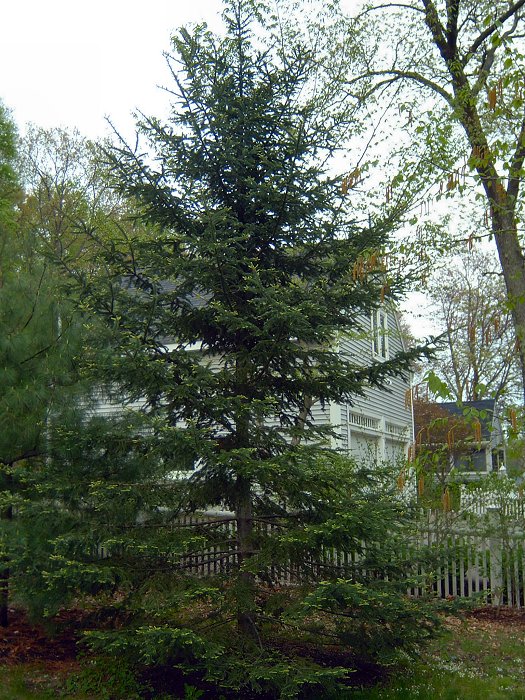
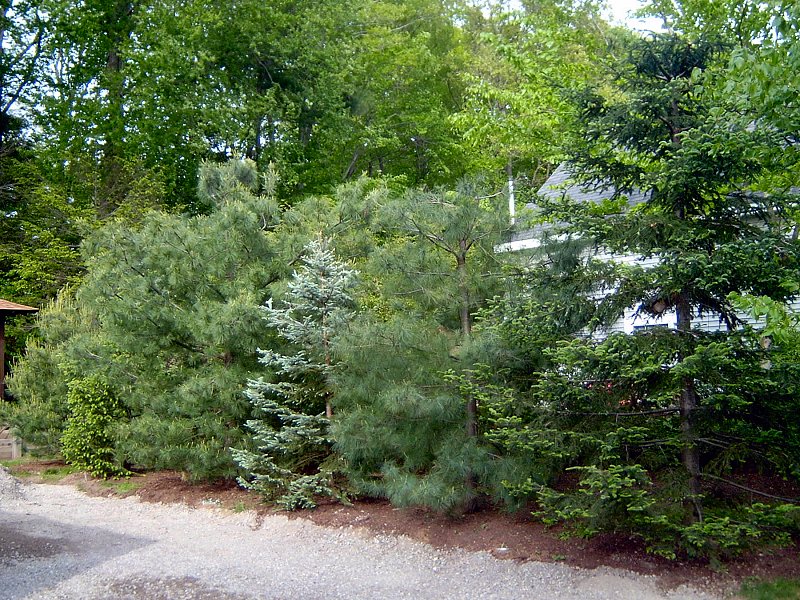
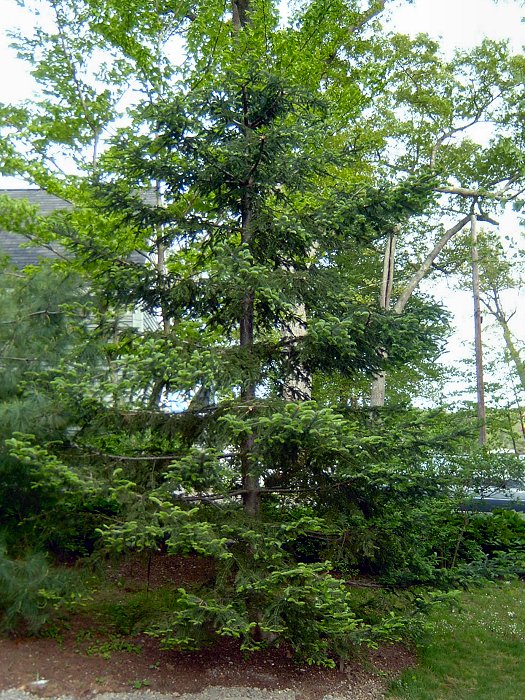
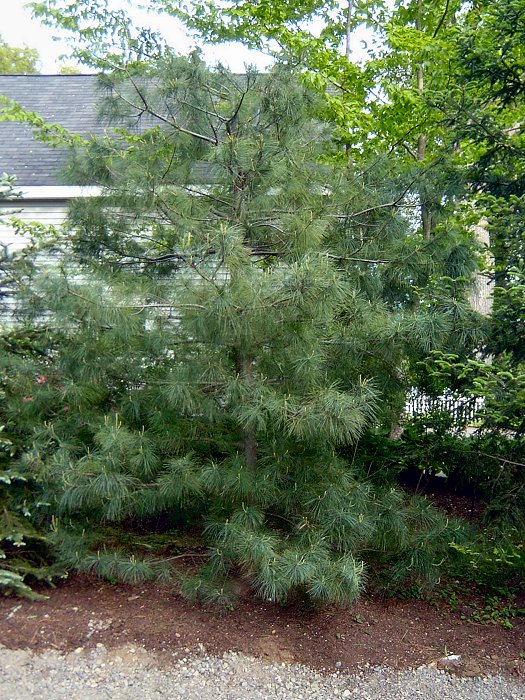
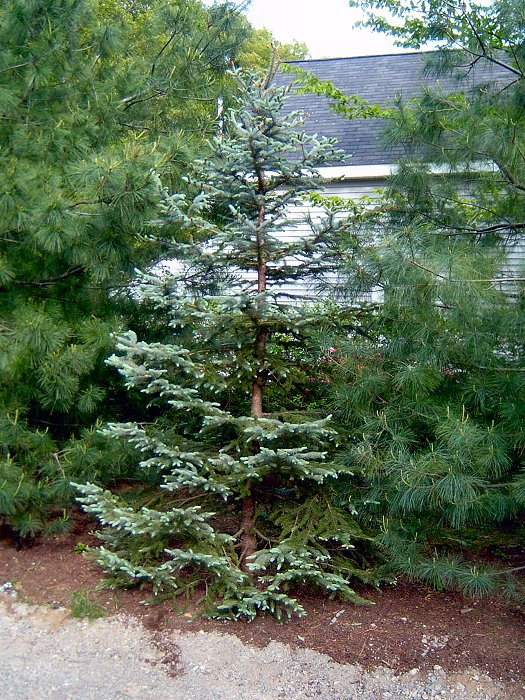
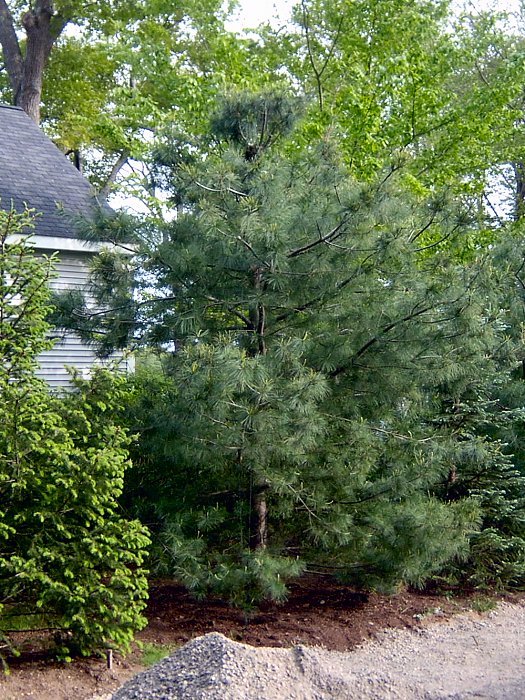
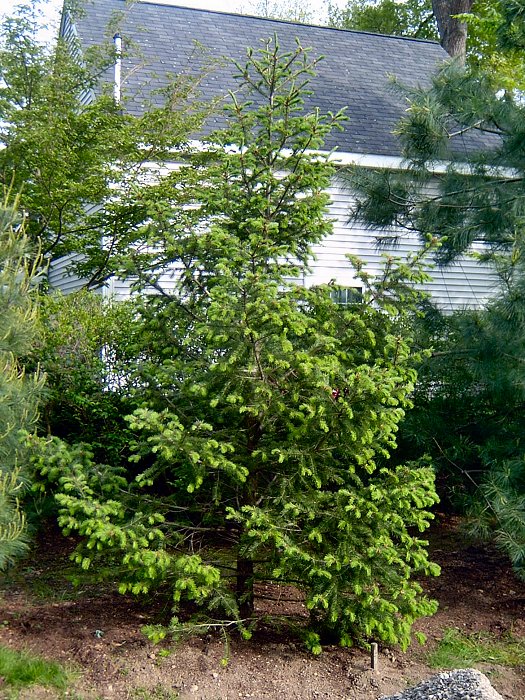
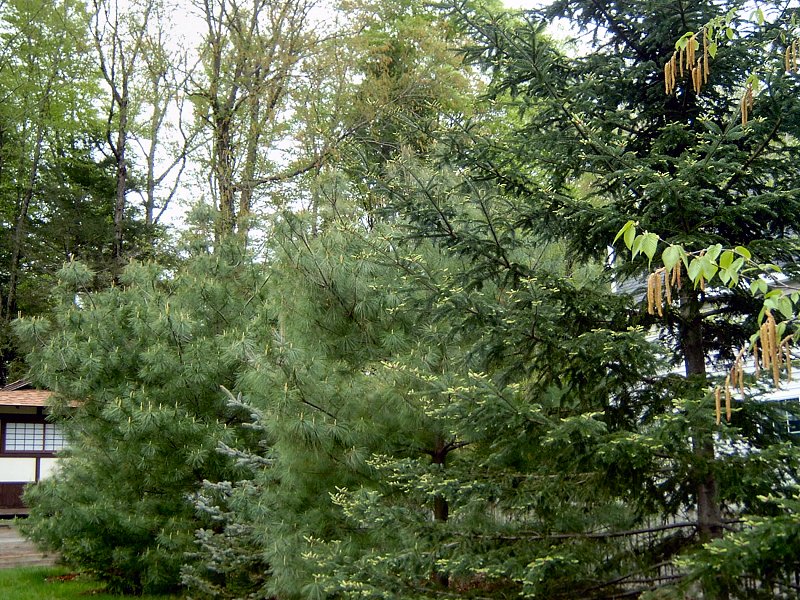 The Pines along the East edge of the lot.
Most of us are familiar with the look of a Pine bonsai , with a gnarled, twisted trunk and tight pads of needles at the ends of
a sparse few branches. It's the "essence" of the tree, and a look I've always found appealing. The same look is often found in full-sized
trees of a traditional Japanese garden (the Pine Garden at the
Adachi Museum of Art ![]() in
Yasugi city, Shimane is possibly the finest example in Japan). I've been wanting to make an attempt at creating my own proper
niwaki (literally "garden trees", as opposed to bonsai which are "potted trees") for a few
years now, although I've been a bit apprehensive about attacking my few Pines with saw and shears. With a "normal" deciduous tree, you can
hack away at the poor thing and if you happen to make a mess of it, the tree will sprout new growth from dormant buds further back on
old growth to fill in the mistakes over time. With most Pines however, once old growth is cut off, it's gone forever as they pretty
much only sprout new growth at the tips. Our trees have been happily growing along now since their last transplant back in 2003, and
were getting to the point where if I was going to do any serious shaping, it was going to have to happen sooner rather than later.
in
Yasugi city, Shimane is possibly the finest example in Japan). I've been wanting to make an attempt at creating my own proper
niwaki (literally "garden trees", as opposed to bonsai which are "potted trees") for a few
years now, although I've been a bit apprehensive about attacking my few Pines with saw and shears. With a "normal" deciduous tree, you can
hack away at the poor thing and if you happen to make a mess of it, the tree will sprout new growth from dormant buds further back on
old growth to fill in the mistakes over time. With most Pines however, once old growth is cut off, it's gone forever as they pretty
much only sprout new growth at the tips. Our trees have been happily growing along now since their last transplant back in 2003, and
were getting to the point where if I was going to do any serious shaping, it was going to have to happen sooner rather than later.
As our garden matured and I knew I'd need to began snipping and cutting in 2008, I took some time to investigate the idea of Pine pruning in the Winter of 2007. I read Cass Trumball's excellent Guide to Pruning book (see below), but she only briefly touches on the idea of Japanese style "cloud pruning" and I wanted more information before taking the plunge. I found Jake Hobson's outstanding Niwaki, one of the first English language books on the subject, gave me the level of detail I needed to confidently begin the process of creating the trees we desire.
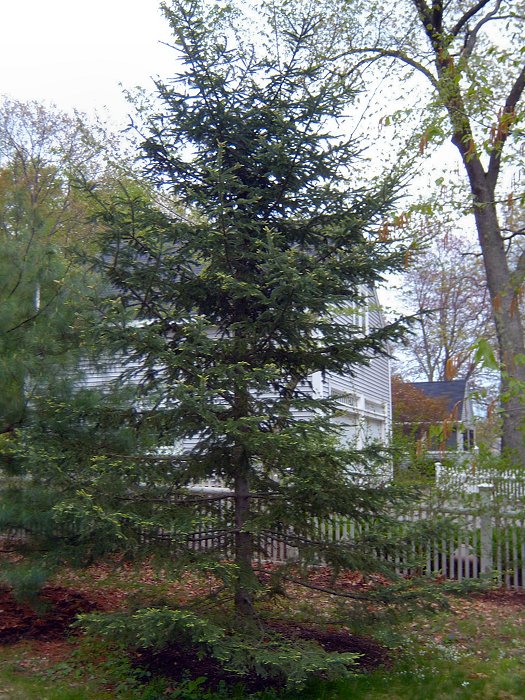
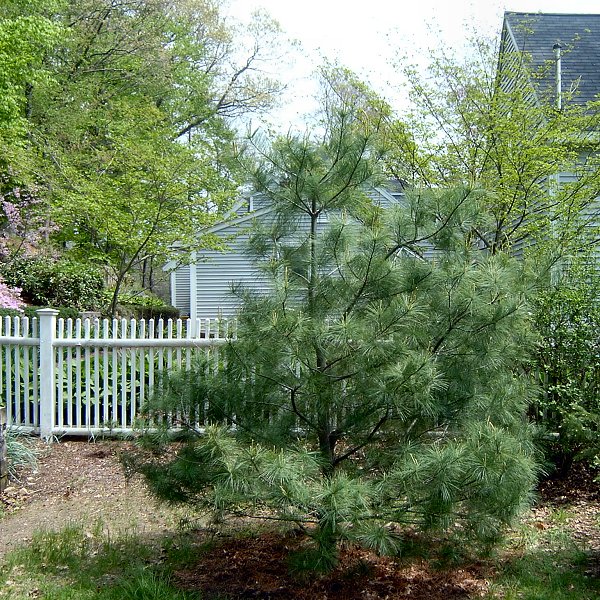
I began Pine pruning in late Summer of 2008, although by that late in the growing season I simply pinched back the main growing tips of the trees to try and slow them down a little until the next year. I also took a few feet off the top of largest Spruce in order to begin forming a proper head this Spring. With a fairly wet Spring in 2009, the Pines have put up a surprising amount of new growth, and seeing that what I did last Summer didn't kill them, I decided to do some more severe formative pruning in addition to candle pinching. Because the trees are well established (the largest of the 6 was nearly 20' tall), there's not much I can do at this point to create a curved or zig-zag trunk-line. Instead, I decided to attempt to remove limbs along the trunk to create areas of less foliage that will give the appearance of "movement" in the trunk while avoiding the "Christmas tree" shape that some of the trees naturally assume.
 Formative pruning on a couple Pines (4 photos).
Formative Pruning
Formative pruning began with a lot of walking around the tree and looking at existing branch locations and foliage concentrations.
Three of the 6 trees are Spruce, and while certainly not an ideal species for what I'd like to accomplish, I think I can still impose an
interesting shape on these things. I also noticed that the Spruce were actually sprouting some new growth further back on the branches
I candle-pinched the year before, so I figure if I really hack off something I shouldn't have, there's a good chance the tree will break
bud to fill in any blanks I create by accident (although if a cut branch is left with no needles at all, it's doubtful it will break bud).
Even though I had removed a couple feet from the top of the largest Spruce, I still felt the new head was going to end up being too tall (mostly because I wouldn't be able to get at the candles easily with my 14' ladder). I took a look at the top cut I had made the year before and saw that it had healed nicely, so I decided to make a new head cut about 4' below the initial one. This would allow me to use one of the side branches just below the new topping cut to form a new head a couple feet above the cut, and off to one side of the center line of the tree (and also reach the candles of the new crown from the ladder). With a mental picture of which branch was going to become the trunk of the new crown, I then worked my way down the tree removing a branch or two from each "ring" of branches to create a bit of a "spiral staircase" with masses of remaining foliage forming each of the steps (I think the danzukuri or "stepped" style of niwaki pruning is the best option for the Spruce). I ran into one problem not too far below the new crown when I found 3 fuzzy pink residents in a Robin's nest located on the branch group I wanted to remove. I skipped that section, and kept working down the tree. I'll go back and remove the branches in that area once the chicks are out and about.
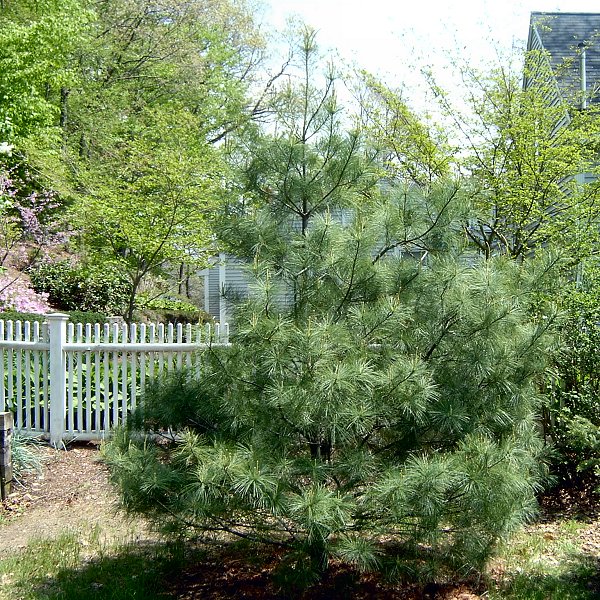
The rest of the Pines also received some formative pruning treatment, with the removal of a few limbs to open up the tree a bit and reveal some of the trunk and branch structure. In addition to the largest Spruce, there's only 1 other tree (a White Pine) that's at the "final height", so the rest of the tress don't get a lot of branch removal at this point. Hopefully I can direct the strongest growth where I want it on the younger tress, and won't need to remove branches later. The smallest of the White Pines had a dead limb fall into it from an Oak a couple years ago, when the Pine was only about 6 feet tall. The limb crashed down and wiped out most of the existing crown and a number of branches from the side of the tree. I cut back the damaged stuff at the time, and wasn't too sure if the tree was going to make it. Looking at the tree now, I think it's got the most potential to form a nice niwaki of all the Pines along the East fence.
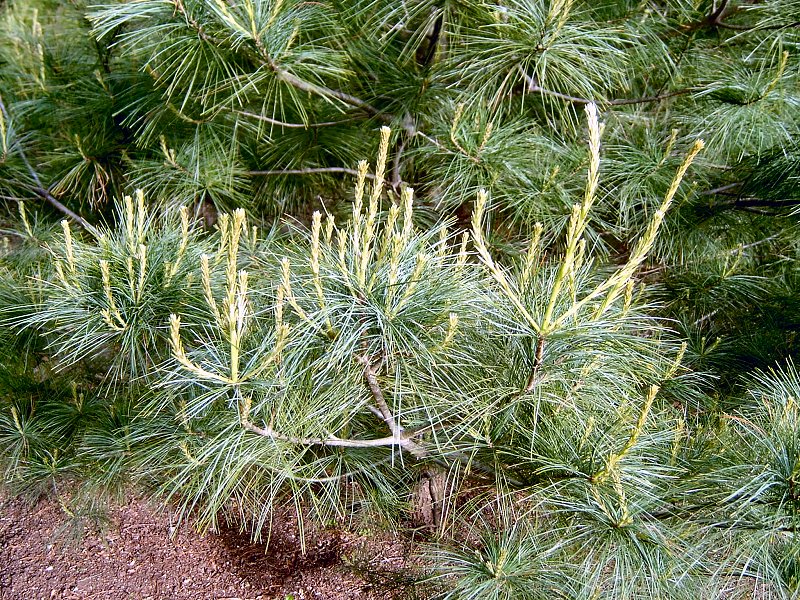
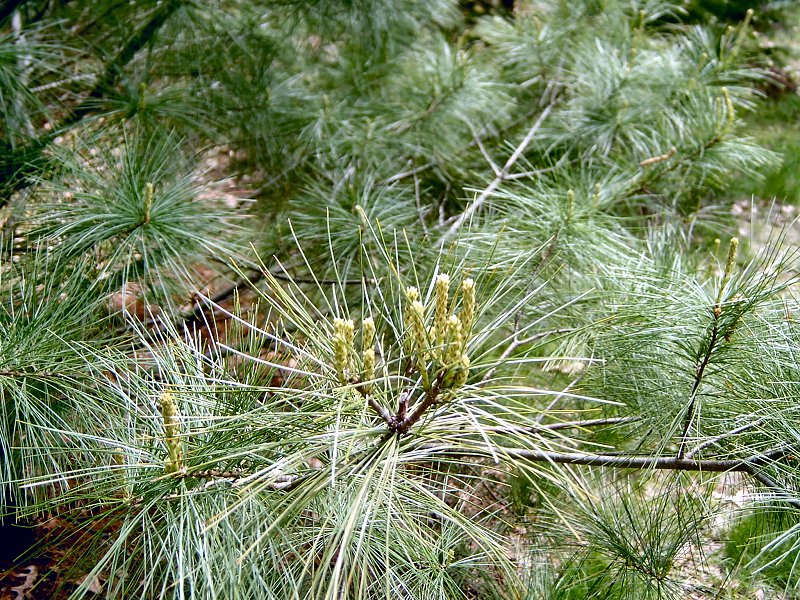
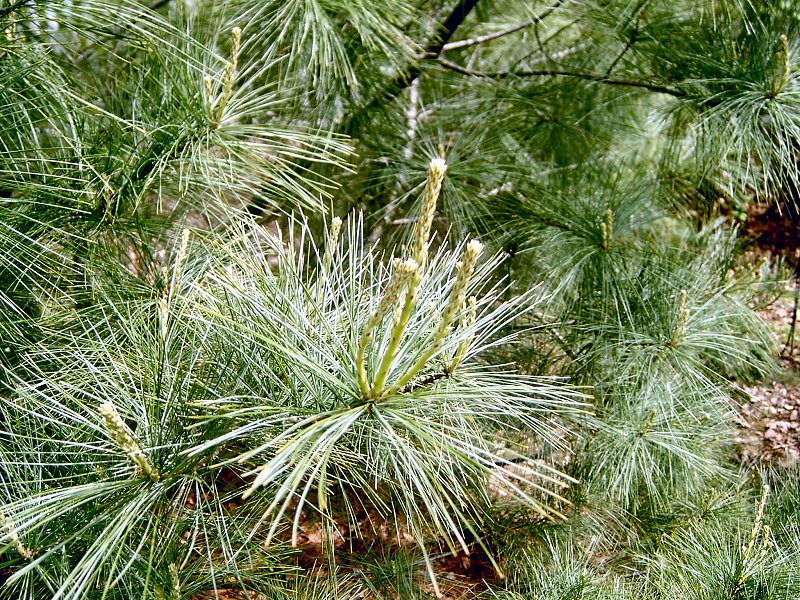
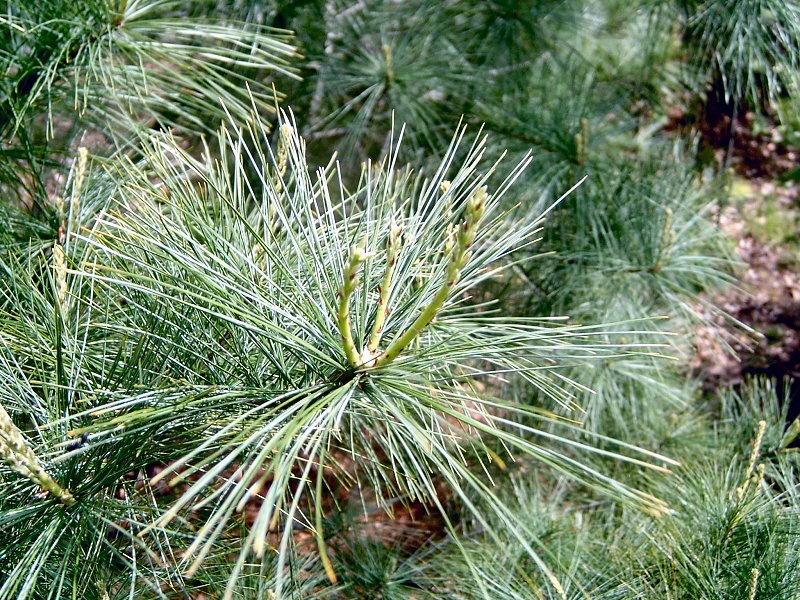
 Candle pinching (5 photos).
Candle Pinching
Once the basic shape is established with formative pruning (or at least as much as I'm going to remove this season - these trees need
a fair amount of work, but it shouldn't happen all at once), the shears and saws get put away, and candle work begins. Developing nice,
full foliage pads on a Pine requires a 2 step process: candle pinching (midoritsumi ) takes place in the Spring,
followed by thinning and old needle removal (momiage ) in the Fall. This candle pinching requires a good deal of
patience and close attention to detail, but I think the results will be worth the effort. I cannot stress enough the importance of doing
this work by hand, and the timing is critical. I highly recommend some cotton gloves with latex palms (like the Atlas AG300 ![]() ) and long sleeves, since you're going to be covered with Pine sap by the time you're done. As for the timing, I did candle work last
year in August on the White Pines. Because the candles were quite long and hard, I went after many of them with garden snips - this
year I could see every spot I had snipped, since the tips of the needles were all brown where I cut candles last year, rather than pinch
them off.
) and long sleeves, since you're going to be covered with Pine sap by the time you're done. As for the timing, I did candle work last
year in August on the White Pines. Because the candles were quite long and hard, I went after many of them with garden snips - this
year I could see every spot I had snipped, since the tips of the needles were all brown where I cut candles last year, rather than pinch
them off.
Because I'm working to develop the shape of these trees in addition to creating dense foliage pads, I don't remove all the first growth candles (as would normally be done during midoritsumi ). Instead, I usually remove the center candle completely by just snapping it off, and then snap the 2 or 3 side candles in half. Each of the side candles will form a new branch (which will then get the same treatment), and removing the center candle of the main branch prevents the main branch from just continuing as a long, straight (un-interesting) pine bough. If I were performing maintenance pruning, then all of the candles would be removed to force a second growth of shorter, stubby candles to be dealt with in the Fall (and thus keep the same basic shape of the tree by preventing it from growing new branches). I do remove all the candles on branches I don't want to extend, or at least snap most of them in half. Every branch tip on the tree gets something done to it, so pinching a single medium tree can be an all day affair.
Once all the trees have received a good going-over, there's nothing much else to do to them but wait for the second flush of growth where candles have been removed. The new stubby candles will also get pinched off (at least on branches I don't want to extend), then I'll try removing some of the old needles further back on the branches that are "finished" to reveal more of the inner branch structure. I may not be having much luck with my bonsai so far, but the same basic concepts seem to be working well on the full-sized trees and we're looking forward having some proper niwaki in our garden someday. I'll add photos again when doing the momiage work later in the season.
 Niwaki 2010 update (12 photos).
Niwaki update: Spring 2010
In addition to the "usual" candle pinching regimen, this year I also took an extra step and did a good deal of lashing
branches into place with jute twine and ground stakes. I removed a few more branches from the two trees near the front of
the lot, although the largest White Pine had a new bird's nest in the very top so there's nothing I can do there until
next year. By pulling many of the branches downward to flatten them out (and build foliage pads near the ends), I'm hoping
to help define the final shape of each tree a bit more. I'll leave the branches tied for a year or so, then see how the
trees look next Spring. The time is coming where I really need to decide which scaffold branches are going to stay, and
which are going to go. So far, I've just been pinching everything to sort of see how much back-budding I can produce on the
larger boughs.
I'm thinking of giving these things one more season, then going really crazy and lopping off the main trunk on the three biggest trees about 8 feet off the ground and starting over on those. The candle pinching on all trees is producing good results, with an incredible amount of branch tip ramification and very vigorous growth throughout the tree, however the arrow-straight trunks on the Spruces may need to be addressed, and that means essentially cutting the tree in half then picking a new leader to form a new main trunk from the cut upward. It sounds pretty drastic, but if I'm going to do it, it needs to happen sooner rather than later. Please have a look through the photos for more information regarding this year's activities.
In addition to the "usual" candle pinching regimen, this year I also took an extra step and did a good deal of lashing branches into place with jute twine and ground stakes. I removed a few more branches from the two trees near the front of the lot, although the largest White Pine had a new bird's nest in the very top so there's nothing I can do there until next year. By pulling many of the branches downward to flatten them out (and build foliage pads near the ends), I'm hoping to help define the final shape of each tree a bit more. I'll leave the branches tied for a year or so, then see how the trees look next Spring. The time is coming where I really need to decide which scaffold branches are going to stay, and which are going to go. So far, I've just been pinching everything to sort of see how much back-budding I can produce on the larger boughs.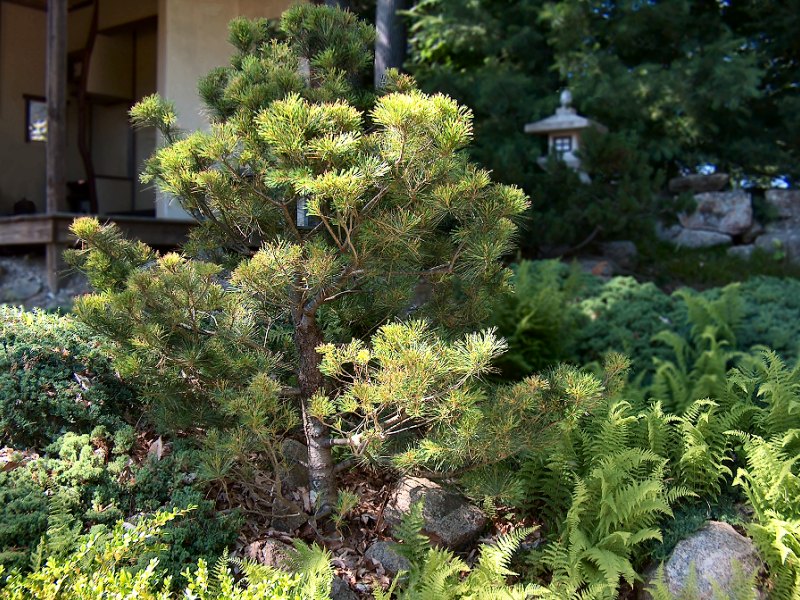 My pruning attempts these days (2 photos).
Niwaki update: Summer 2022
I couldn't do it. I tried pinching candles every Spring, but I just couldn't keep up with it between the mashed hand and
dealing with the bamboo. The White Pines along the Eastern property line are just going nuts at this point, and I don't
have a tall enough ladder (or the interest) to try and do any more shaping on these monsters. I did manage to do some work
on a tiny little White Pine that sprouted on its own in front of the tea house, and I've been judiciously keeping up with that
with lots of candle pinching and pruning. It's a nice little feature in the view of the karesansui
from the tea house, and I hope to be able to keep up with a single tree. I would have liked to take care of shaping those trees
along the Eastern property line, but unless the shaping work starts when they're only a couple feet tall, it's just too much for
me to try to manage each Spring.
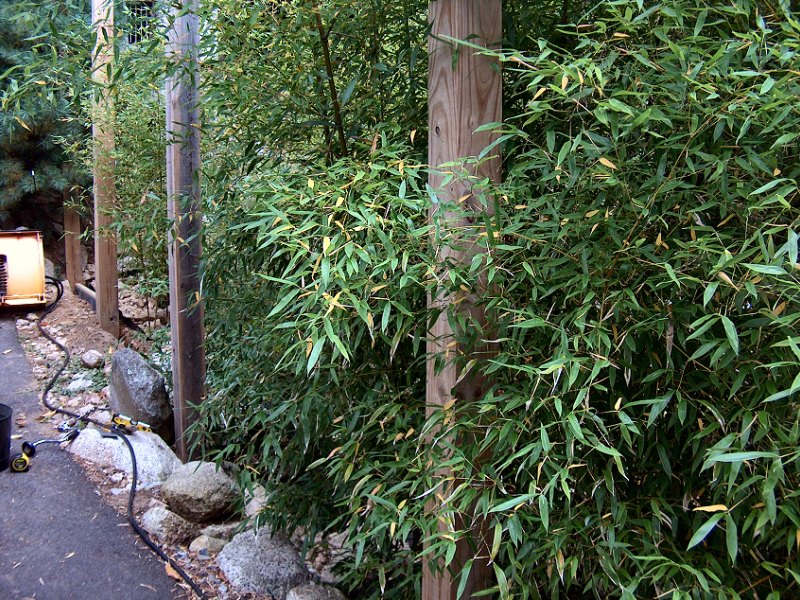
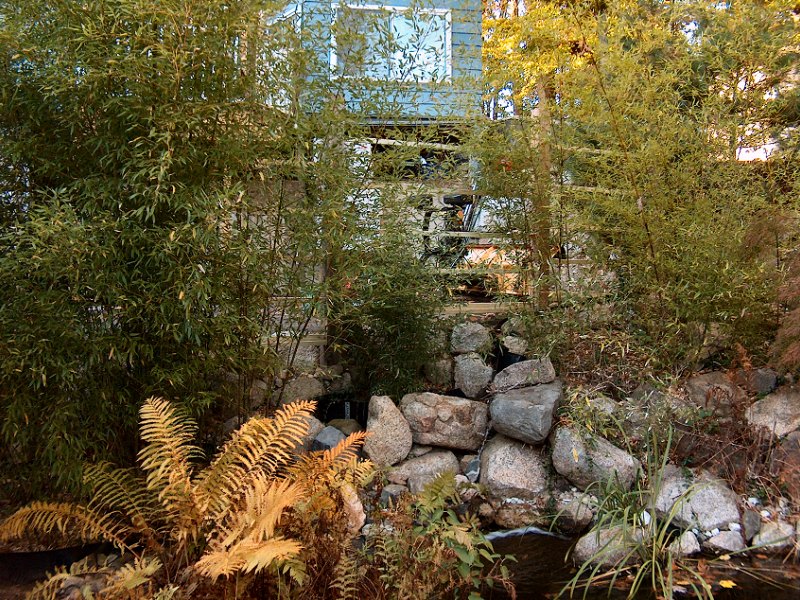
Dealing with the Bamboo
You may recall that back in 2014 I had started working on moving the rocks behind the bamboo with my neighbor along the West property line (see the 2014 News Archives and 2015 News Archives), as he wanted to extend his driveway. You also may recall that I mashed my hand during that little rock moving adventure, resulting in multiple surgeries to repair the Flexor tendon in my right ring finger (which never worked). I then attempted to continue the Joiner's Bench project and fiddle with yard work as my finger healed. What I don't believe I've mentioned as I've been neglecting the site, is the absolute horror show that dealing with the bamboo turned out to be.
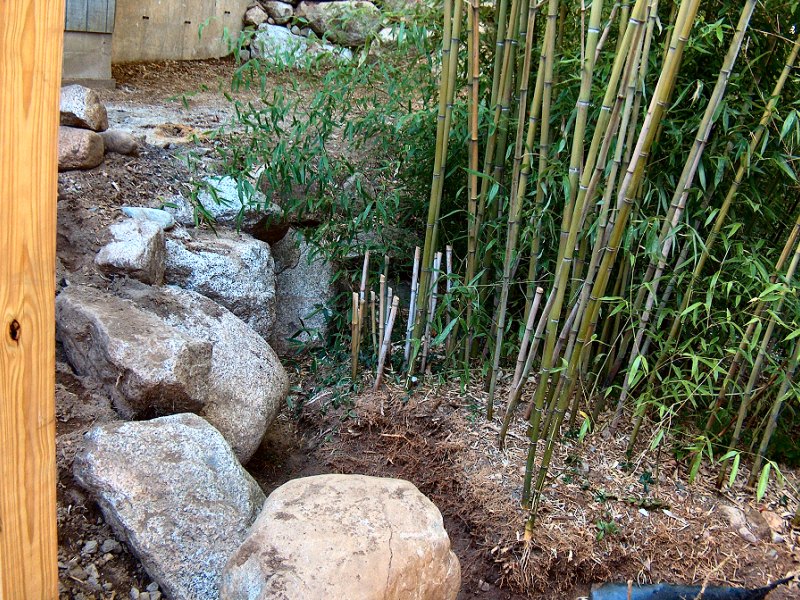
 The Bamboo at the property line (3 photos).
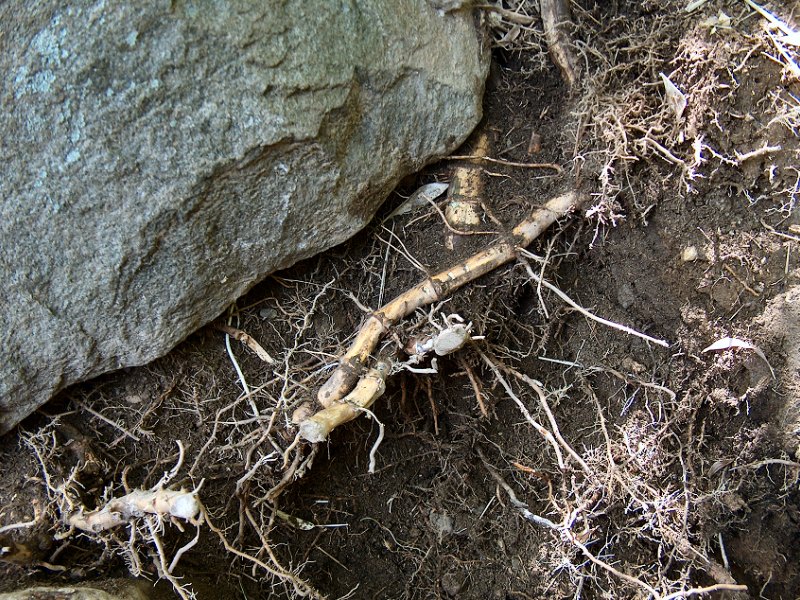
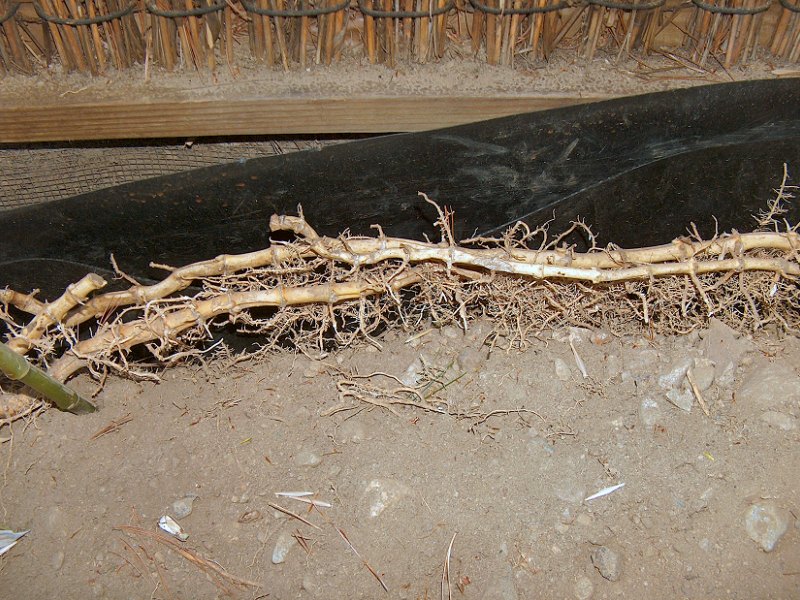
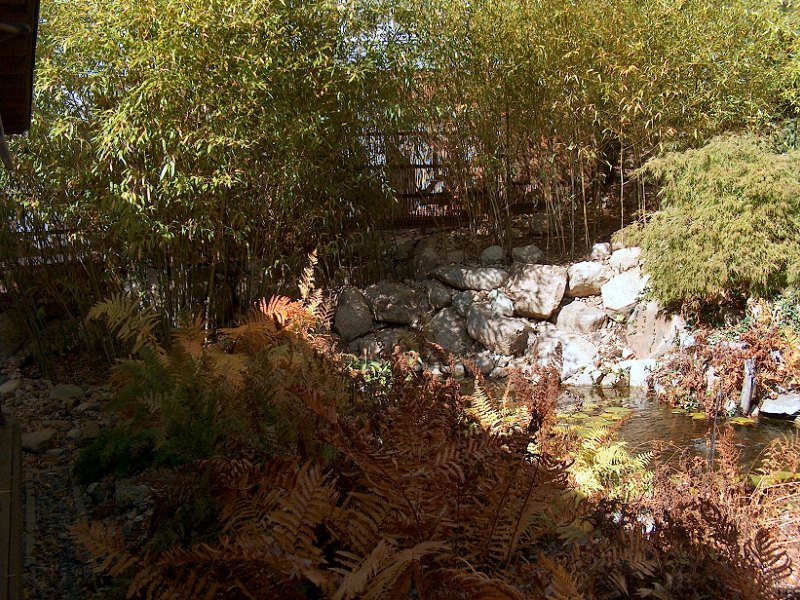
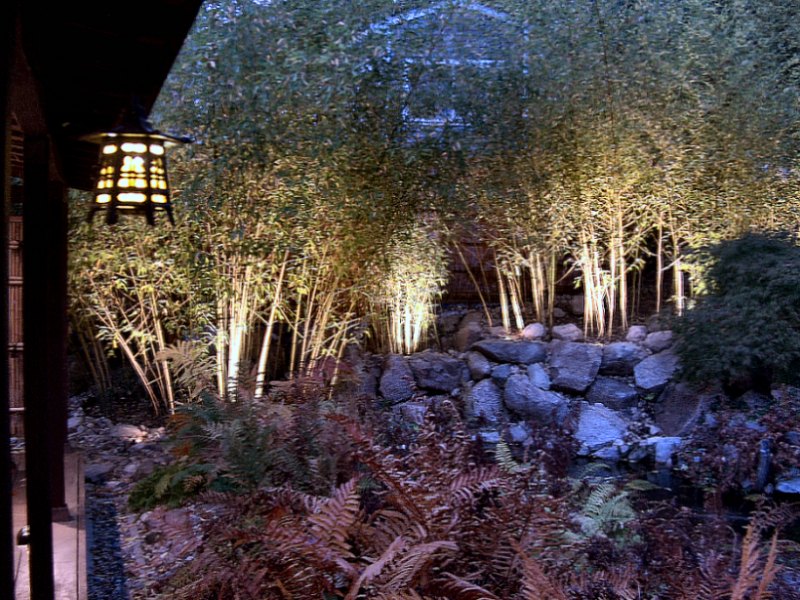
Phyllostachys nuda (Snow Bamboo or "Nuda") is pretty amazing stuff. It's one of the more cold-hardy bamboos so it grows very well in New England. Under ideal conditions it'll reach a height of 60-feet, with poles that are up to 1-1/2-inches in diameter. It expands through rhizome "runners" that it sends out in the Fall, then new shoots pop up each Spring from those runners. As the shoots come up each year, they will reach a certain height (say 10-feet), and that's as tall as that shoot will ever grow. Shoots that come up the next year will then grow a little taller (say 15-feet), and so on, until it starts putting up massive shoots that'll hit 50 or 60-feet in a single season. It stays green all year 'round, unless the temperatures get below 10°F for a week or so which results in all the leaves turning tan and falling off. If the temps get to -10°F for a week or so, then the shoots will actually die off, and even the roots may take some damage (if there's no snow cover to insulate the ground). It's those runners that caused all the issues, and have taken me years of work to deal with…
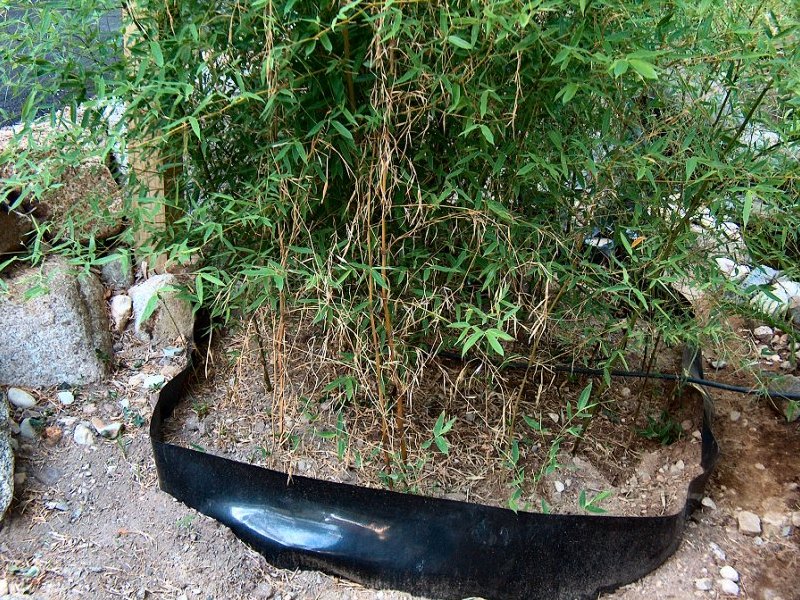
When we first added a couple innocent little clumps of Nuda to the garden back in 2003, it seemed like it would be a wonderful way to block our view of the neighbor's big blue box of a house that overwhelmed the scene behind the West side of our yard. The bamboo seller had explained how to deal with the runners and contain the stuff with the installation of a bamboo root barrier. The barrier material is about an 1/16-inch thick by 3-foot wide black plastic material that gets buried around the bamboo planting area, sticking out of the ground a few inches. When the runners are doing their thing in the Fall, they hit the barrier, and turn away to find another place to run, and everything stays nicely contained. I had explained that both planned bamboo locations had a retaining wall behind them, and he advised that no barrier would be needed at the wall, since the runners stay within a foot higher or lower than the original planting — if they have to climb or dive more than a foot, they'll end up turning back to get near the surface again. That all sounded perfectly reasonable, so I buried my 3-foot wide bamboo root barrier about 2-1/2-feet deep, and moved on to other projects. The bamboo apparently didn't know it wasn't supposed to climb, so it had other things in mind.
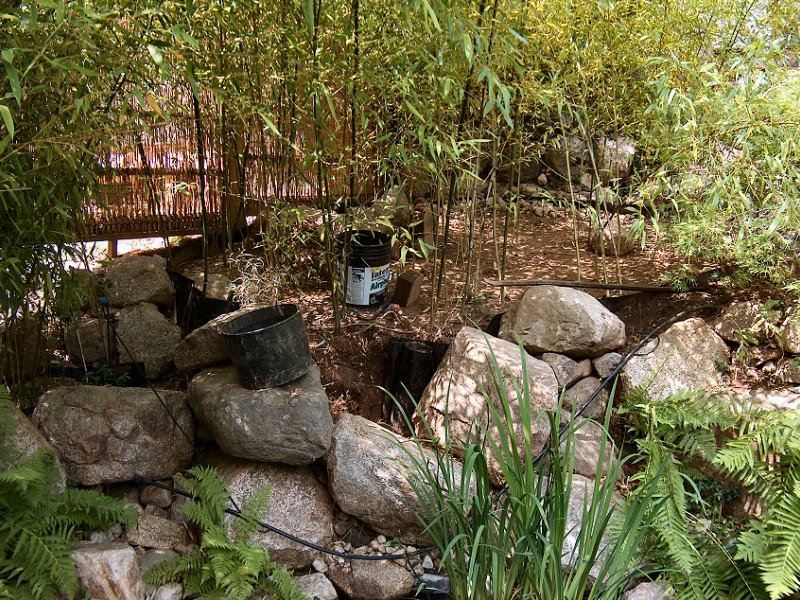
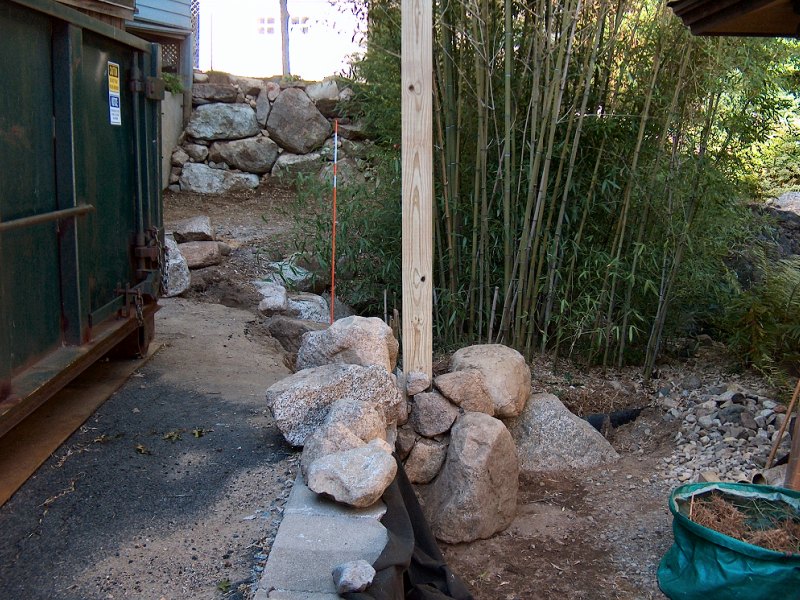
The problems first showed up when the neighbor started working on extending his driveway and did some further excavation work in 2008, after we re-located the property line block retaining wall back in 2006 (see the roof installation page for more info). In the Spring of 2009 the neighbor had noticed a little bamboo shoot had popped up in his planned driveway extension area, and he wasn't happy about it. I dug out the roots and runner that had caused the problem at the time, but then we didn't do much else in the area until we started working on re-locating the rock retaining wall behind the bamboo in 2014. As we removed the rocks from the original retaining wall, I kept finding runners that had found their way under the rocks and up into his driveway area (the area behind the dumpster in the photos). So much for the stuff not climbing. I also found some runners from the planting in the section above the pond had run all the way up the hill and had started popping out around the tea house. This was not good. More pokin' around showed that runners from the lower section had gone up the wall behind the pond, run in front of the upper section's barrier, then started popping up near the upper waterfall filter. These runners had gone everywhere, and it was obvious I'd need to make some attempt at getting them all contained again.
 Installing barrier next to the driveway (8 photos).
Installing New Bamboo Root Barrier: 2012-2021
For the next couple years, whenever the weather was good I'd work on digging all the runners out of the planned driveway section in
my neighbors yard. I'd get a section cleared, then he'd bring the skid-steer and we'd put the rocks into their new location along
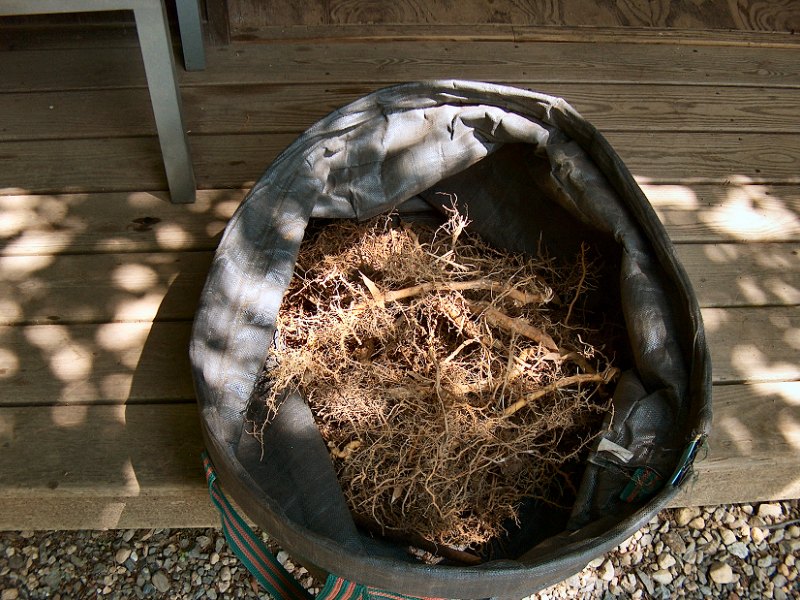
the property line, and then I'd work on clearing a new section. Trying to get these bamboo roots removed was awful work - shovels were
pretty much useless, as the roots are packed almost solid, about a foot thick. Imagine trying to get a shovel to penetrate a foot
thick bird's nest made of 14 ga. wire, filled with rocks and soil. Not happening. I first tried getting better shovels, and ended
up with a few of the best shovels on the planet from W. W. Manufacturing Co. Inc.![]() of New Jersey. No more broken shovels, ever. Still no joy though (even their "Ground Shark" can't get anywhere in this stuff).
I ended up with a U.S. Forest Service firefighter's fiberglass-handled Pulaski axe from Forestry Suppliers, that I could use in
combination with my 6-foot steel pry bar to break up clumps then chop them free. All day, up and down, prying then chopping at the roots,
then the root clumps would get sifted over the wheelbarrow to ensure every bit of root was out of the soil. The roots would then all
go into a tip bag, and sit in the sun for a few days to dry out before finally burning them in the fire pit. No chance I was just
gonna toss this stuff in a brush pile in the woods — with my luck it'd take root and spread all over town. I'd then dig a trench
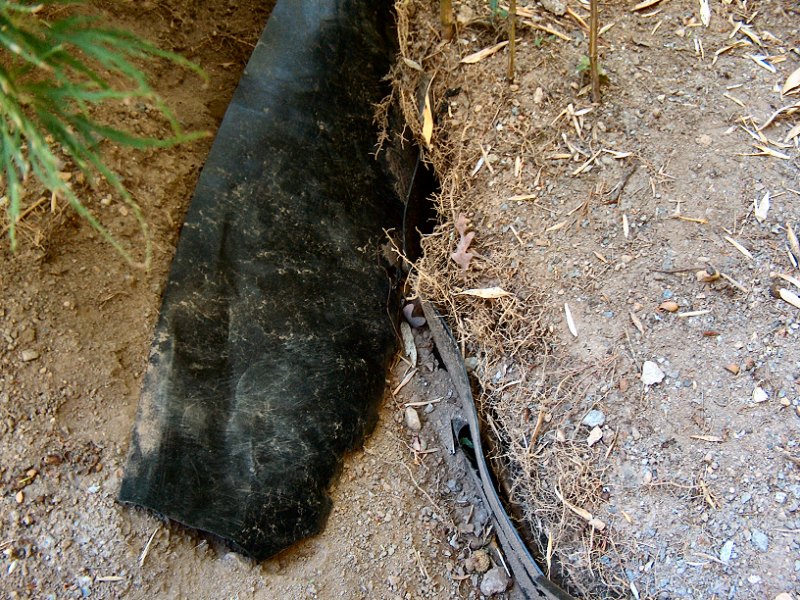
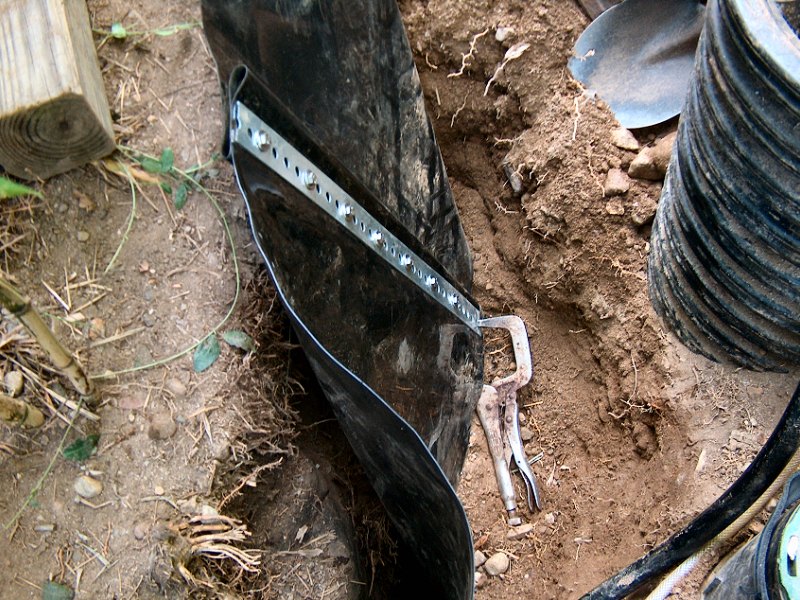
around the perimeter of the roots that were staying in place, and install the new root barrier material.
of New Jersey. No more broken shovels, ever. Still no joy though (even their "Ground Shark" can't get anywhere in this stuff).
I ended up with a U.S. Forest Service firefighter's fiberglass-handled Pulaski axe from Forestry Suppliers, that I could use in
combination with my 6-foot steel pry bar to break up clumps then chop them free. All day, up and down, prying then chopping at the roots,
then the root clumps would get sifted over the wheelbarrow to ensure every bit of root was out of the soil. The roots would then all
go into a tip bag, and sit in the sun for a few days to dry out before finally burning them in the fire pit. No chance I was just
gonna toss this stuff in a brush pile in the woods — with my luck it'd take root and spread all over town. I'd then dig a trench
around the perimeter of the roots that were staying in place, and install the new root barrier material.
After nearly three years of this nonsense, I got the lower section next to my neighbors driveway done. The new barrier was in place, and I'd even installed a couple fence posts while I had everything along the property line excavated. The original barrier along the driveway around the upper bamboo section had done the job, but the back of that area had failed (since I hadn't originally put any barrier along the retaining wall below the tea house), and stuff from the lower section had climbed up behind the pond, as mentioned above. With the rocks in their new position along the property line, I also added a new "mid section" of bamboo barrier between the lower and upper areas, to help fill in some of the blank space caused by the reduced size of the lower section. I certainly had plenty of rootstock to transplant at this point.
 Finishing up the upper section (10 photos).
For the upper section barrier, I had started with new stuff along the driveway/fence location while that was all getting excavated, then left the barrier roll in place up there while I finished the lower and mid sections. By 2018 I got to work on the fence along the driveway (see below), then had to deal with some other issues (the septic system, big Oak trees, etc.) before I could finally get back to more prying and chopping around the upper section for a couple more years.
I got the stuff up near the pond filter and the Japanese "Waterfall" Maple cleaned up and backfilled in late 2020, with the final section to be done in 2021. Much of the upper section required lots of rock moving to get everything out of the retaining wall below the tea house, although those rocks were relatively small. The retaining wall behind the pond however, was made up of some massive boulders and yet there were runners that had squeezed between them and come out the top. I'd dig around as much of the boulder as I dared, then used a "come-a-long" to pull each boulder up to stable ground so I could get at the runners beneath the boulders. Scary.
In the Summer of 2021 I finally did the last of the work to install the new bamboo root barrier. All sections have 2-1/2-feet of barrier buried below ground, with about 6-inches sticking up above ground. The rock retaining walls are re-built, and we've even got a new fence (see below) along the neighbors driveway behind the bamboo.
More Bamboo Root Barrier Work: 2021-2022
While doing some leaf clean-up work around the lower section of bamboo in late 2021, the lovely bride mentioned she had seen what looked like a little bamboo pokin'
up in the ferns near the pond. I went out and took a look, and sure enough — there was a little sprout of bamboo coming up between the
engawa and the pond, a couple feet from the recently installed new root barrier. I moved a bunch of rocks around and started digging
the thing up, to find that a runner had poked through the new barrier and run along the edge of the pond about 3-feet before popping up a shoot earlier
that Spring. After moving a bunch more of the small landscaping rocks, it became clear that while working on the upper section of barrier installation, the
lower barrier (which had been completed in 2018) had been stretched by the contained runners by nearly a foot on all sides! Apparently there was enough
internal pressure against the barrier from the root mass, and it had been stretched so thin, that after a few years a runner at actually poked right through the
barrier material and started running outside once more. Unbelievable!
As a quick fix I cut the runner off, then slid a 3-foot by 1-foot piece of extra barrier material in between the roots and the existing barrier to block the hole. The amount of stretch the roots had put against the barrier was shocking, so I was faced with having to go around the perimeter of all the new barrier again to inspect everything and see if any other runners had managed to break through the barrier. I worked around most of the lower section in the Fall of 2021, adding a second layer to the existing barrier in 3-foot long chunks, each about a foot deep, cut from the left over replacement barrier roll. I found a couple other spots where runners had made their way through the replacement barrier (but only by a few inches, as it was in the process of doing it's Fall runner growth at the time), so I re-directed the runners into the center of the clump, then blocked the holes with new chunks of barrier. It was looking like I would have to double check all the new barrier to see how much it had stretched, then get another layer of stuff installed to reinforce the new barrier.
 Another Summer of dealing with the bamboo (9 photos).
By late Spring of 2022, I was ready to get after the barrier one more time. I also noticed a new little bunch of bamboo had sprouted up behind the pond — likely a remnant of the runners that had originally jumped the lower barrier and run around the back of the pond. I had cut off some big shoots back there when doing the original upper pond barrier work in Summer of 2021, but hadn't pulled the biggest rocks up at the time. Apparently I had missed some roots under those boulders, so they'd need to come up to get this stuff taken care of at last.
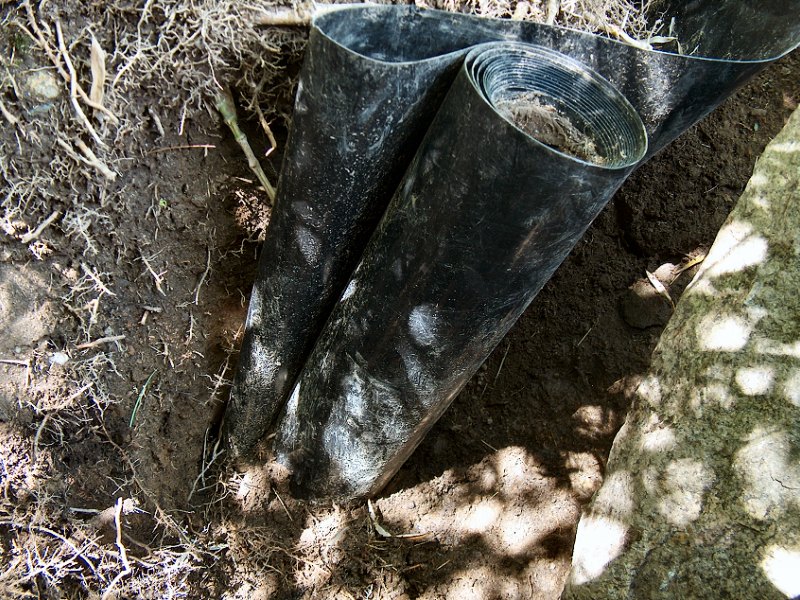
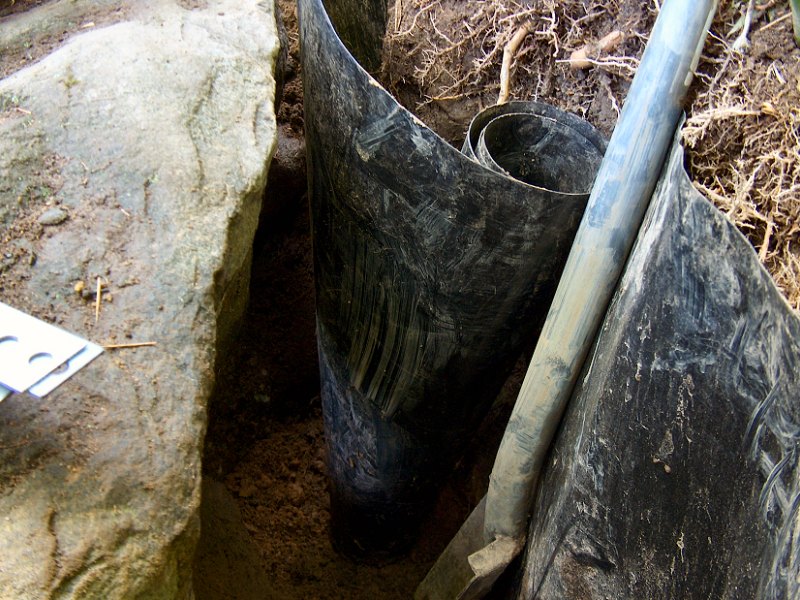
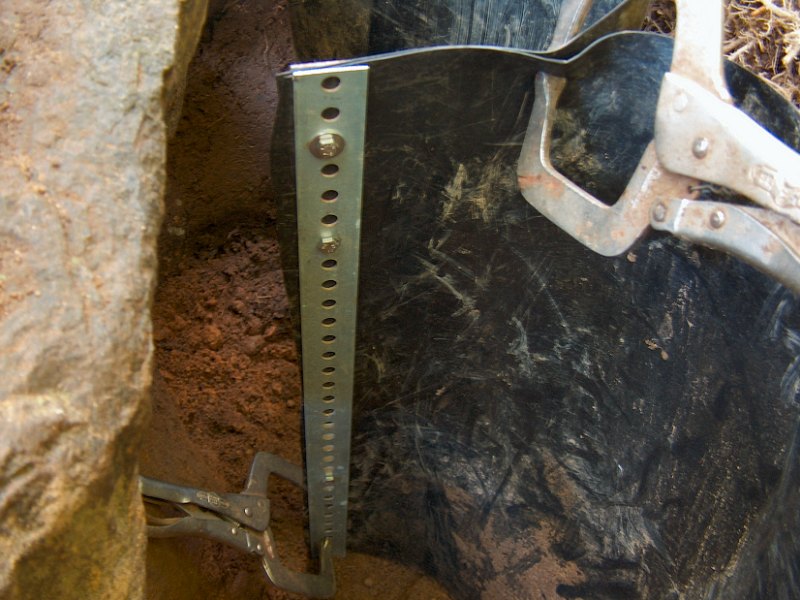
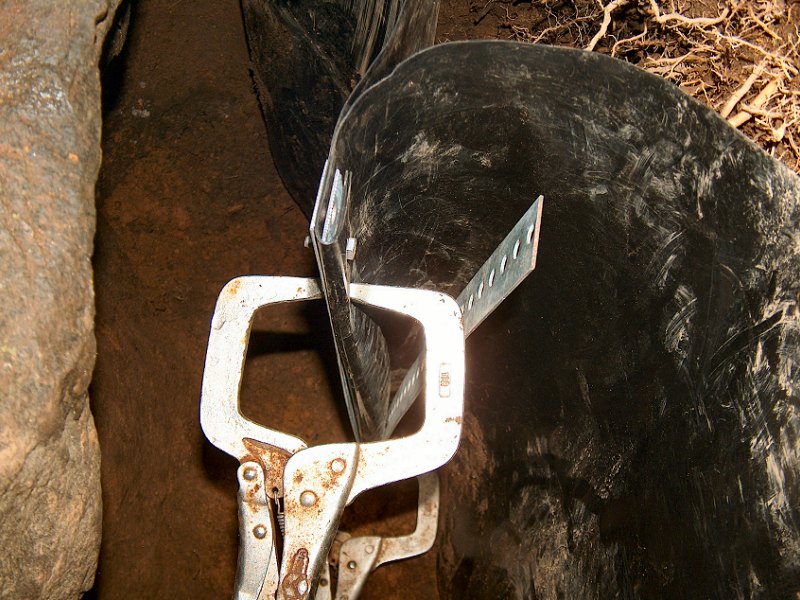
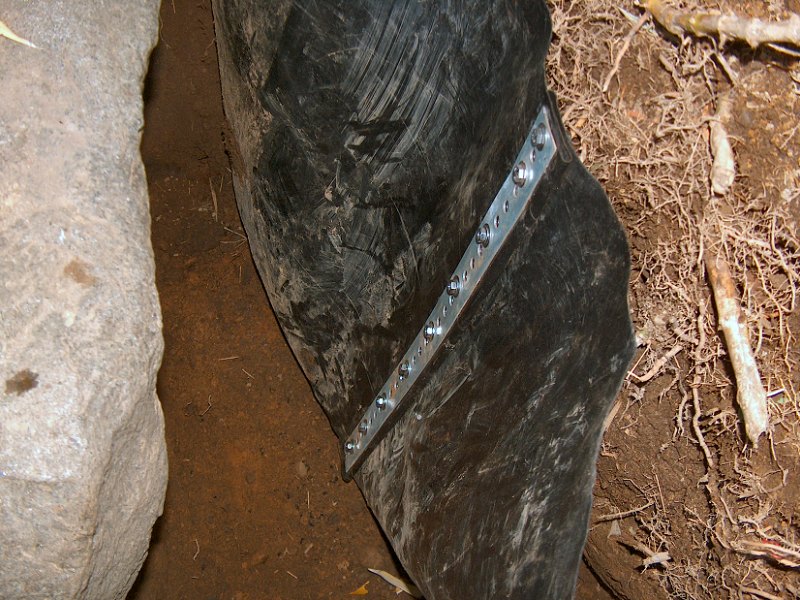
This time I also got some serious root barrier, rather than that 1/16-inch thick stuff I had used last time. I found some 12 gauge HDPE barrier made by Doniks® on Amazon, which is about an 1/8-inch think and boasts a 200 lb. puncture resistance. I started with a 10-inch by 60-foot roll to do the upper and mid sections, then got another 20-foot roll to take care of the lower section. I started working the upper section up behind the Japanese "Waterfall" Maple, and found another runner had pierced the barrier (that I put in two years earlier), and run along the barrier almost 5-feet. It had just run right next to the barrier, so it came out fairly easily. To get the new stuff in, I removed all the little landscaping rocks, then dug down about a foot or so on the outside of the barrier. I then inserted a pair of straight spades on the inside of the barrier and pried the barrier out to make enough room to slide the new barrier into place. All this digging allowed me to ensure there were no stray roots and runners outside the barrier (there weren't any more than the one behind the Maple), and I made pretty fast progress along the front of the upper section and around the corner to run along the fence.
Getting that first bit or barrier in place took a good part of the Summer, but before I worked around the back of the upper section, I decided to deal with the little sprouts under the boulders behind the pond. The rocks near the top of that rock wall weren't too heavy, so I was able to get those out of the way with a couple pry bars and some wood blocks. More excavation under where those rocks had been revealed a few bamboo runners coming up from deeper under the wall, which meant the big rocks were going to have to come up too. To get the big boys outta there, I pulled out the 2-ton come-a-long and anchored it to one of the White Pines on the hill behind the bamboo. I rigged up a sling around the rocks and cranked the first couple up and into the bamboo. I didn't have any where to "park" the largest of the few rocks I intended to move, so I ended up just lifting it as high as I could, then leaving it suspended there while I dug out the roots. I did keep my 6-foot pry bar in place underneath the thing, so if the rigging failed the bar would stop it from tumbling in to the pond.
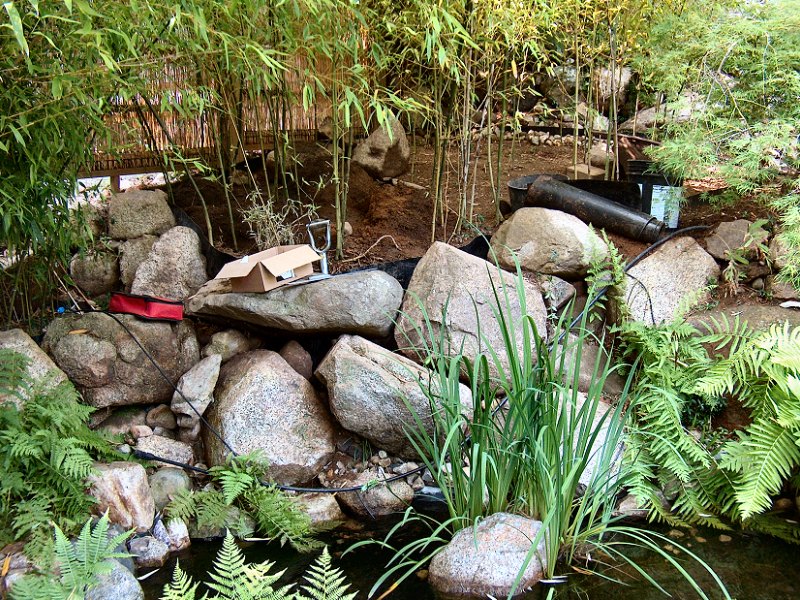
I'm confident I managed to get every scrap of old bamboo root out of the rocks behind the pond, so I spent the next few week getting all the rocks back in place and continued to get the new barrier installed using the "two spade" prying method. After lots of re-arranging rocks and excavation around all three sections of bamboo, I finished getting the new barrier installed by the end of September, 2022. I even managed to pick up a set of SUNVIE® low-voltage LED Well Lights, and got those installed along the front of all three sections of bamboo while I was getting the landscaping rocks back in place. I sure hope this new barrier does the job — I don't know how much more of this I can take.
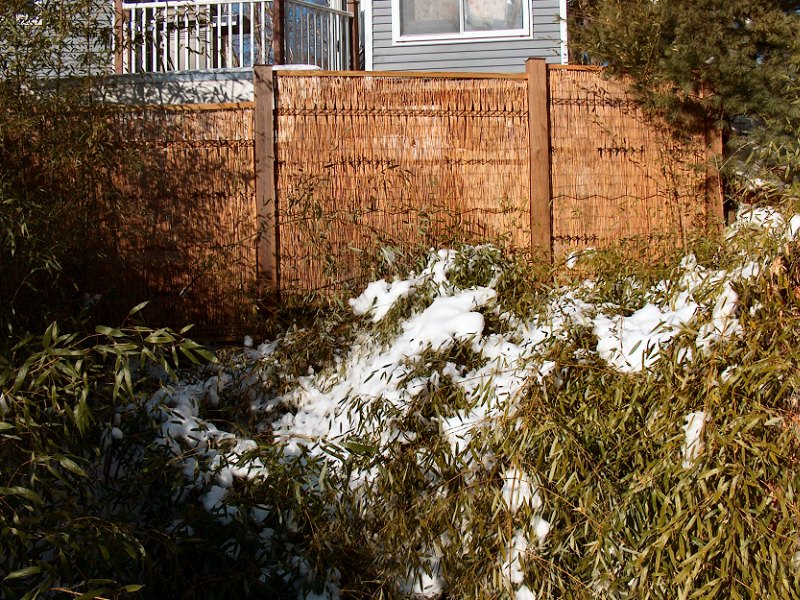
Bamboo Garden Fences
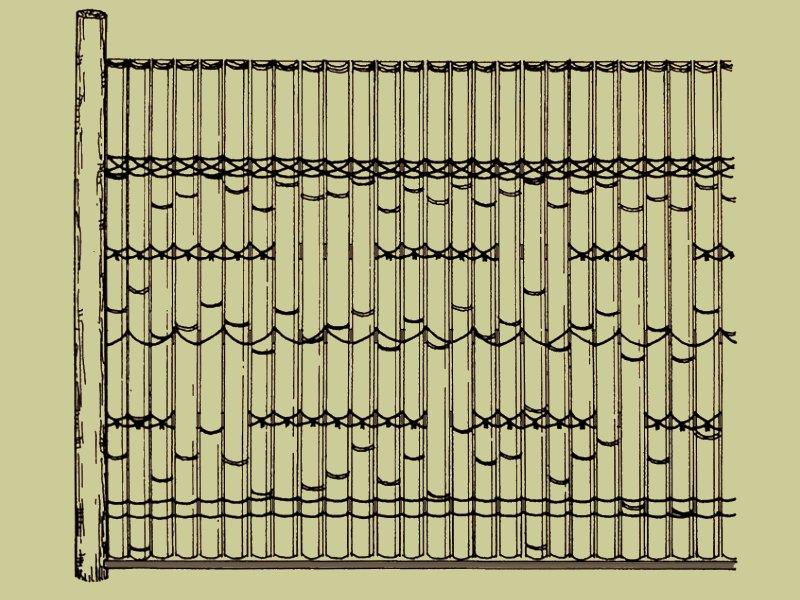 The tokusa-gaki style fence design (from Bamboo Fences, below).
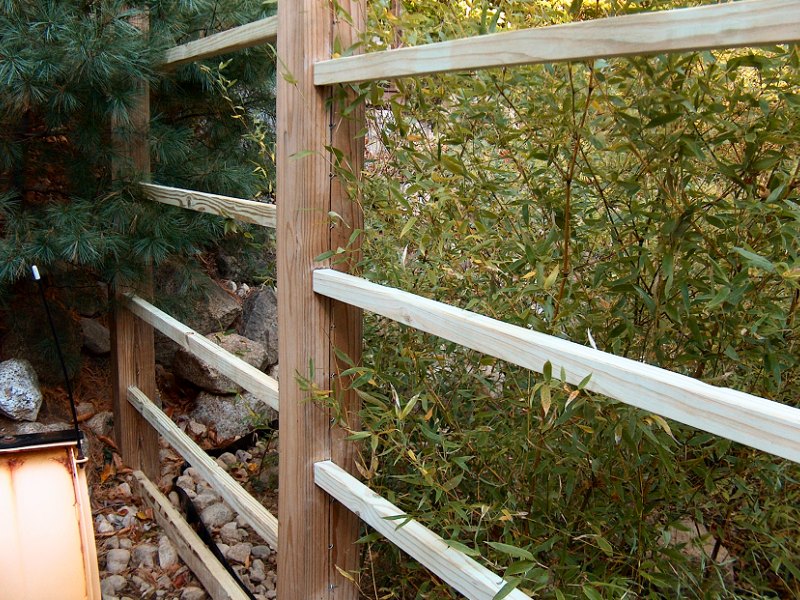
While re-locating the stone retaining wall behind the bamboo along the West property line, I took the opportunity to add our first perimeter fence to the back yard while doing the bamboo excavation work. We'd often thought about adding a bit of fence up along the West edge of the tea house (which we still intend to do), especially after the neighbor parked a plastic shed right behind the teahouse. We'll also eventually add something along the East property line near the tool shed, since the neighbor on that side removed the white picket fence that used to be over there. With all the work happening behind the bamboo however (and the neighbor's goal being to store more equipment over there), getting a screen fence up in that area became a priority.
My first bamboo fence project was back in 2013 when I built the sode-gaki for the end of the engawa. I'd learned that the toughest thing about putting up a good looking bamboo fence in New England is sourcing the actual bamboo. I've found that surprisingly, Home Depot has a fair selection of rolls of bamboo poles, but they're usually only available for a few weeks in the Spring. Once they're sold out, they don't seem to come back until the next year. Since this fence was going to be behind the bamboo and pretty well blocked from view, I decided to just go with "natural reed" fencing, rather than actual bamboo. This stuff comes in 6-foot tall by 16-foot long rolls for less than $30 a roll, so the price was right. I also planned to use black para-cord for all the ties, rather than the traditional dyed palm twine — again, this thing was going to be mostly hidden from view, so I went with easy-to-source materials.
The actual fence design I selected was the tokusa-gaki style, as this doesn't require the significant split bamboo cross bars (oshibuchi) that are fairly difficult to find around here. The fence would have four sections, with three at about 7-1/2-feet long, and a short 5-foot section at the end. As long as I kept the height under 8-feet tall, no building permit was required. With the reed rolls at 6-foot tall, the final height would be around 7-feet with a little space at the bottom, and the posts sticking up a little at the top.
 Getting started on the tokusa-gaki fence build (10 photos).
Building the Tokusa-gaki Style Fence
While most of the 10-foot 6 x 6 posts were installed while working on the bamboo, the actual fence build got underway in late 2018
as all the bamboo root barrier along the property line was finished at that point. The posts had been set using Quikrete®
Fast-Setting mix within each post hole then backfilled, so those were quite solid. Now that I had mostly figured out the fence
design, I trimmed the posts to the proper height and got started on fence construction.
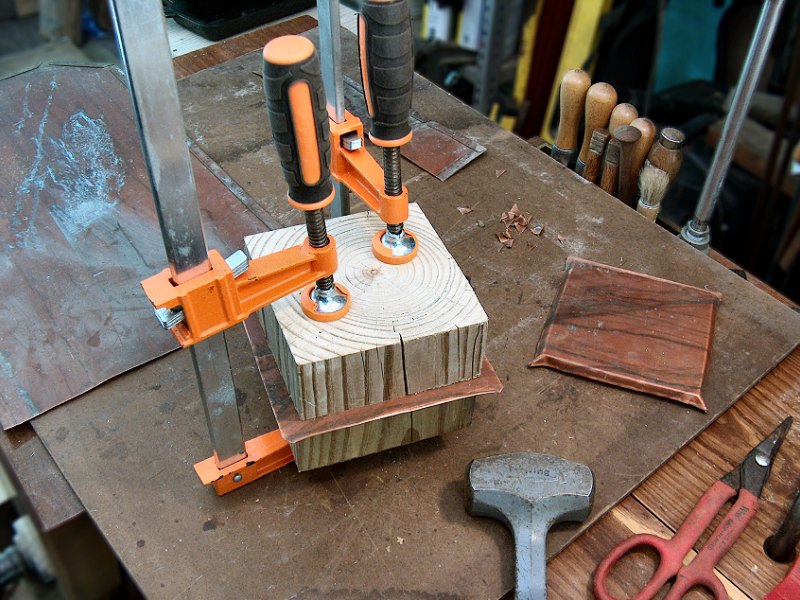
The first thing I addressed was the post caps. Most of thee posts had been in the ground for a year or two, and I wanted to get some manner of caps installed to prevent water getting into the end-grain over yet another Winter. I had some extra Copper sheeting, so I carefully cut a couple short chunks of 6 x 6 as forms, then trimmed the sheeting to slightly oversize (about 6-1/2-inches square), folded over and flattened 1/2-inch along each edge, then clamped the piece into the 6 x 6 chunks and bent down a 45° overhang on each edge. I then applied a generous slather of silicon sealant to each post top, put the cap in place, and sat a rock on it for a few days while the sealant cured.
The cross bars were somewhat challenging, since the posts were already cemented in place. I planned to use pressure treated 2 x 4s as stock for the cross bars, ripped in half and milled square (so basically 1-5/8-inches square). I figured I could cut a fairly long tenon on one end (about 1-1/2-inches long), with a shallow tenon on the other end (about 1/2-inch long), then fit the long end into a mortise one post and bow the cross bar to pop the shallow end into the matching mortise on the other post. I also had to consider how many cross bars were needed for each section of fencing, which I based on the wire used to hold the reed fencing together. The fencing has wires about every 4-inches, so planned for a cross bar to line up on every 4th wire (about every 16-inches). This worked out to five cross bars for each section, with the bottom bar acting as a shelf with a 2 x 4 screwed to the back of it, then four more spaced every 16-inches up the post. I also cut a little dado in the bottom cross bar where it would be attached to the 2 x 4, so I had room to attach a bit of 1/8-inch hardware cloth screening to keep leaves from getting under the fence. The screening was stapled to the bottom cross bar and buried a few inches in the soil, then the supporting 2 x 4 was screwed into place and the screw holes plugged.
 Finishing the tokusa-gaki fence (3 photos).
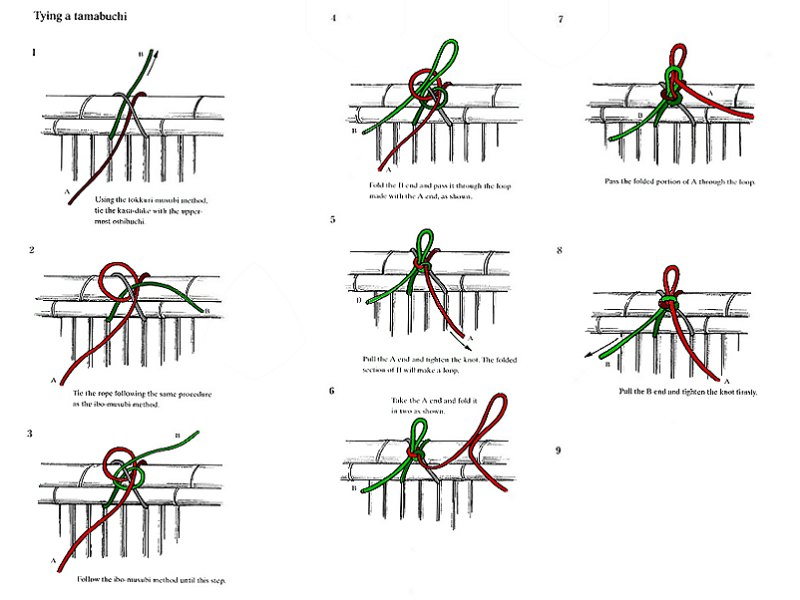
The rolled reed fencing was installed by threading the wires at the end of the roll through fence staples on the posts. One end of the roll was stood on the bottom support, then a few inches of wire left at the end was put through the post staple and wrapped back onto itself. It was then unrolled and stretched tight along the cross bars, and attached to the cross bars with the narrow-crown pneumatic stapler over the wire. The other end was then trimmed, leaving some extra wire, and attached the fence staples on that end's post. Once I had the four sections filled with reed fencing, I could see that a single layer wasn't going to do the job of screening the view of the stuff in the neighbor's driveway. I initially had enough extra fencing that I could add a second layer to the short end section, and found that leaving the second layer a little loose while stapling it to the cross bars (rather than stretching it tight) added enough bulk to the fence to properly block the view of the stuff on the other side.
I managed to get that short section finished with a second reed layer, and even got all the Ibu-musubi ties in place that first year, but then got pulled onto other projects through most of 2019. By the Summer of 2020, I'd been able to get the last of the bamboo root barrier in place and took care of finishing up the fence. I added a second layer to the other sections of the fence, then spent many hours threading para-cord and tying knots to get the thing completed. I had also added an additional cross bar along the top of the reed fencing after the first Winter, as I'd found that the bamboo would bend over under snow loads and tear up the top of the reed fencing. To try and keep the thing in good condition, I apply a liberal coat of Thompson's® WaterSeal with a sprayer each year. Hopefully we'll get many years out of this fence, as I can't imagine trying to re-tie all that cord again. It seems to be holding up well so far, and we're very pleased with how it looks.
More photos and updates to follow as work progresses…
Gardening Reference Materials
The following titles have been used both to design some of the aspects of the garden, as well as more practical advice regarding pruning and construction. Additional titles are listed in the Tea House and Bonsai sections

Sakuteiki Visions of the Japanese Garden:
A Modern Translation of Japan's Gardening Classic
by Jiro Takei, Marc P. Keane
Publisher: Tuttle Publishing
Pub. Date: September, 2001
ISBN-13: 978-0804832946

by Thomas Daniell, Akihiko Seki
Publisher: Tuttle Publishing
Pub. Date: September, 2010
ISBN-13: 978-4805310915

The Japanese Tea Garden
by Marc P. Keane
Publisher: Stone Bridge Press
Pub. Date: December, 2009
ISBN-13: 978-1933330679

by Kiyoshi Seike, David H. Engel, Masanobu Kudo
Publisher: Kodansha International
Pub. Date: February 1993
ISBN-13: 978-4770016614
Japanese Garden Design
by Marc P. Keane, Ohashi Haruzo
Publisher: Tuttle Publishing
Pub. Date: September, 2004
ISBN-13: 978-0804836043
by Charles Chesshire
Publisher: Lorenz Books
Pub. Date: April, 2008
ISBN-13: 978-0754817727
Japanese Gardening
by Charles Chesshire
Publisher: Aquamarine
Pub. Date: June, 2006
ISBN-13: 978-1903141342
by Michiko Rico Nose, Michael Freeman
Publisher: Tuttle Publishing
Pub. Date: August, 2002
ISBN-13: 978-0804834377
Living with Japanese Gardens
by Lisa Parramore, Chadine Flood Gong, Svein Olslund
Publisher: Gibbs Smith, Publisher
Pub. Date: July, 2006
ISBN-13: 978-1586858186

by Geeta Mehta, Kimie Tada, Noboru Murata
Publisher: Tuttle Publishing
Pub. Date: November, 2008
ISBN-13: 978-4805309421

Japanese Gardens: 80 Glorious Gardens
by Pavel Cihal, Romana Cihalova
Publisher: Pavel Cihal
Pub. Date: 2005
ISBN-13: 978-8023951974
by David Young, Michiko Young, Tan Hong Yew
Publisher: Tuttle Publishing
Pub. Date: October, 2005
ISBN-13: 978-0804835985
Niwaki: Pruning, Training and Shaping Japanese Garden Trees
by Jake Hobson
Publisher: Timber Press, Inc.
Pub. Date: April, 2007
ISBN-13: 978-0881928358
by Eric Mader
Publisher: Kingyo Press
Pub. Date: 2005
ISBN-13: 978-1411625655
Building Bamboo Fences
by Isao Yoshikawa
Publisher: Japan Publications Trading
Pub. Date: October, 2001
ISBN-13: 978-4889960808

What, When, and Where and How to Prune for a More Beautiful Garden
by Cass Turnbull, Kate Allen
Publisher: Sasquatch Books
Pub. Date: December, 2005
ISBN-13: 978-1570614682
Bamboo Fences
by Isao Yoshikawa, Suzuki Osamu
Publisher: Princeton Architectural Press
Pub. Date: April, 2009
ISBN-13: 978-1568988344
by Lee Reich
Publisher: Taunton Press
Pub. Date: March, 1999
ISBN-13: 978-1561583164
↑